Skip to content

Posts from the ‘Exterior’ Category

A flue fiasco

Just in time for warm weather we pulled the trigger on capping our chimneys, a project we’ve delayed for more than three years. Our house has survived two hundred seventy-something years without caps on the chimneys. When a fireplace is actively used, this is a sustainable situation. When it’s not, problems arise because critters move in.

Each spring, like clockwork, chimney swifts newly arrived from South America set up house in our living room chimney. Although there was a certain charm to hearing the plaintive chirps of the baby swifts as they were fed by their parents each evening, the knowledge that the byproducts of those feedings were accumulating above our damper was a bit off-putting.

In addition, I’d noticed a squirrel had taken a keen interest in our middle chimney, often settling atop it for long sunbaths in the late winter. More on that later.

A few weeks ago, I called the local chimney “experts” to work up an estimate. We decided to spring for durable copper caps to make this a once-and-never-again project. To sweeten the deal, we also elected to reline one of the chimneys so that we could use the living room fireplace. Although our house has 8 fireplaces (maybe 9), due to age-related deterioration of the masonry, we can’t use any of them until they’re lined properly.

My dealings with the chimney folks did not have auspicious beginnings. The first sign of trouble was when the estimator called and couldn’t figure out which chimney was which – his field technicians hadn’t relayed that information to him, even though I made a scale drawing of the roof and suggested it might be helpful for them to take it back to the office.

Later, the estimator called again to deliver the news that the liner “won’t fit” in our chimney flue.  Since this was the first mention of any difficulty despite an hours-long site visit a few days earlier, I was miffed, and asked for some time to think things through. The next morning, with no interim conversations, an estimate that included the lining of the chimney appeared in my inbox. Confused, I called the estimator back and was told that he had made arrangements with a chimney supplier to fabricate a custom oval liner that would fit neatly in our flue. Although the estimate total was stomach-churning, we went for it, anticipating the luxury of a crackling fire on crisp fall nights.

Meanwhile, my gut was screaming, “These guys are a joke.”  Silence, gut.

Fast forward to installation day. Again, inauspicious beginnings: the lead tech commenced hauling out bag after bag of pourable cement insulation that would be used to insulate the new liner, although I had specifically requested that we use a less permanent fiberglass wrap. After a long conversation, I conceded to using the insulation in the interest of moving the job along.

An hour or so later, I heard some loud banging and raced downstairs down to find the installers attempting to indelicately snake a 30 ft. long steel liner through my brand new kitchen. I screamed “STOP!” and politely explained the idiocy of what they were about to attempt. Taking matters into my own hands, I grabbed every scrap of cardboard I could find to fashion corner protectors for my newly-installed cabinets and walls. Then I helped to carefully steer the liner to the foot of the fireplace.

chimney liner

Next, the techs set up scaffolding and a winch on the roof. Once they had the liner connected to the rooftop hoist, they began slowly pulling the tube up the chimney. For the first fifteen feet or so, it was like a “hotdog down a hallway”, as they say. And then, a piercing screech as metal dragged across brick. Peering up the chimney, one of the workers in the living room yelled to his colleague on the roof, “What’s the problem?!”

A pause. “It’s stuck,” came the reply.

They weren’t kidding. The liner was wedged into place and wouldn’t budge in either direction. A variety of tools started to emerge from the crew’s supply vans. At one point, I’m fairly certain I saw someone sitting in my fireplace shoving a garden hoe up the flue. It turns out that our chimney flues twist 90 degrees halfway up. Why the chimney crew hadn’t figured this out prior to installation day, I’ll never understand. I was deliriously upset at this point, and had to excuse myself to confer with my wife.

“Send them away,” she suggested. This, unfortunately, was not an option given that half the liner was still draped across our living room floor.

The lead technician retreated to the corner for a hushed phone conversation with the owner of the company and then, channeling his inner surgeon, announced that he would have to “go in”.

“Go in?” I asked.

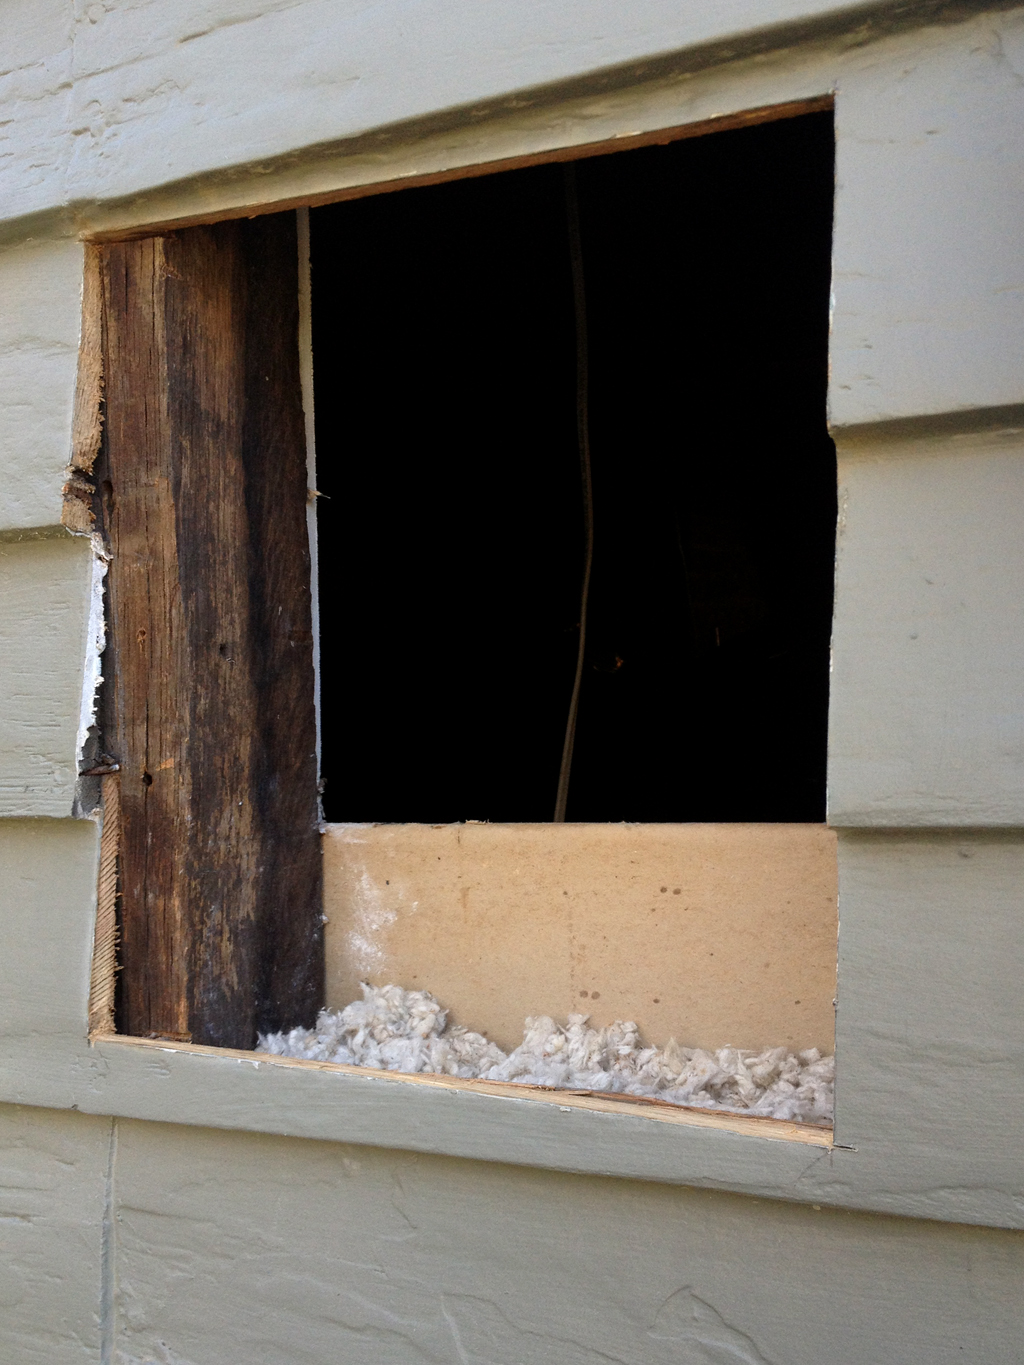
“Yes, we’re going to cut into the chimney from the outside to free the liner.”

The one and only ground rule I had given this company from the very first phone call was that they were not allowed to touch the exterior of the chimneys…period. The brick is historic, fragile, and held together with lime mortar, which nobody knows how to use anymore.

Those of you who know me know that I maintain a fairly even keel emotionally, but I’m certain the veins in my forehead looked like a bowl of spaghetti at hearing this news. Believing that the liner was actually stuck, I conceded to the chimney breach. But when I heard the sound of the electric grinder spinning up to speed outside, I went to the fireplace and leaned on the liner with all my might.  It budged, a little at first, then more freely. I raced outside, ordered the grinding to stop, and asked the crew to get the liner out of my house.

I called the owner of the company and scolded him, more politely than I should have, for completely botching the entire operation. He admitted their fault and fed me a bunch of nonsense about using this as a “teachable moment” for his staff.

“Neanderthals can’t be taught,” I thought.

I made it clear that I would not pay for anything related to the chimney lining and asked that they cap the chimneys and leave our house, post haste.

Two days later, a different pair of technicians showed up to cap the chimneys. I reminded them that I had seen a squirrel sitting atop the middle chimney and asked that they verify for certain that no squirrels were in the flue before installing that cap.

A few hours later, they finished up and insisted that it was impossible for a squirrel to get into the middle chimney.

The following morning, I looked out our bedroom window and, sure enough, a squirrel was frantically circling the new cap on the middle chimney, gnawing at its corners. I suspected that this was an adult female squirrel trying to access babies that she had nested in the chimney. Fearing that she would chew directly through our pricey new copper caps, I spent the better part of the morning racing up and down the roof in an attempt to scare her away. After awhile, it became clear that there were only two ways this was going to get resolved: either momma squirrel was going to get her babies back, or she was going to wreck shit.

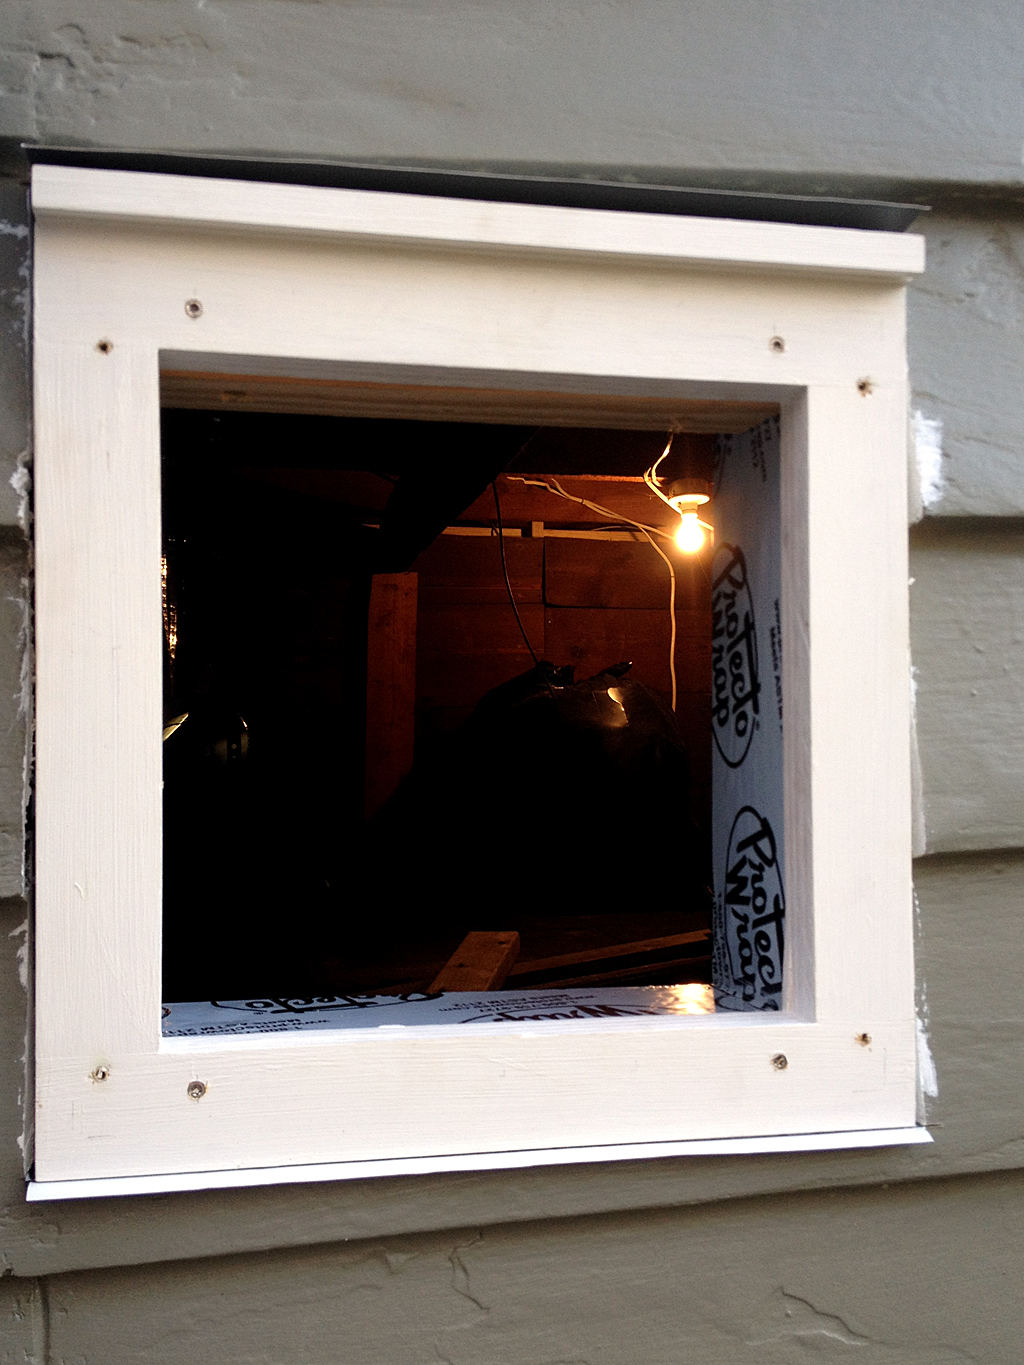
I called several wildlife control guys who were more amused than helpful when I described the situation. The only useful piece of advice I got was the suggestion that there was only one place the baby squirrels could possibly be: on top of the damper. While Weezie monitored the premises for the psychotic momma squirrel, who had temporarily retreated to plan the second wave of her attack, I set to work trying to free the damper which was weighed down by bird crap, chunks of old bricks, and (spoiler alert) a squirrel’s nest.

It took half an hour of vacuuming and persuasion, but the damper finally popped up and revealed a couple of furry baby squirrels, very unhappy to have their morning slumber interrupted. I transferred as much of the flea-ridden, ammonia-scented nest into a cardboard box as I could and carefully tucked the babies into their new accommodations. Problem (partially) solved.

squirrel baby

Unsure of what to do next, I turned to the world’s greatest repository of completely random information, YouTube. I quickly learned that squirrel moms will relocate their babies to backup nests if their primary home is compromised. So, I needed to get the babies to a place where their mom could find them when she returned. With some scraps of wood, I fashioned a stool that would straddle the ridge of the roof and support the box-o’-squirrels, not far from where there nest had been.

squirrel box

With the box perched on the roof, I sat down to wait for momma squirrel. As dusk settled in, and squirrels began scurrying across the yard towards their nightly hideouts, my target scurried down the electrical service wire to our house, scaled the side of the chimney, and planted herself on the ridge of the roof. Clearly, she could smell her babies (it would be hard not to, those are some funky critters). After a few minutes of poking around the box, she finally found the kids, tucked them into a ball in her mouth and took off to greener pastures.

I caught momma squirrel’s initial explorations on video. You can see her sniffing around the box, clearly confident that her babies are nearby, but not yet sure where to look. I apologize for the quality – I wanted to move in for a closer view, but I didn’t want to scare her away:

Thankfully, the squirrel family seems to have adapted to their new home and hasn’t returned to our rooftop. People sometimes ask me why I’m so reluctant to hire contractors to work on the house. This whole frustrating ordeal is a great example of what can happen when you mistakenly hire someone that doesn’t care about doing a good job, which seems to be frustratingly common in the trades.

To recap, after a lot of grief, we now have:

0 working fireplaces,

1 damaged chimney,

2 fewer baby squirrels in our house,

and 3 sparkly new chimney caps.

copper chimney cap

Was all the grief worth it? Absolutely not. It’s nice to have the chimneys capped for good, but next time I hire someone, my gut gets the last word.

Until then, I’ll strive to attain the level of Zen-like chill that our dog Meg has mastered:

meg


Overdoing it

A word of advice: never celebrate the one-year anniversary of a one-room renovation project, no matter how ambitious it is. I’m ashamed to say that we recently blew threw that milestone after life did its very best to sap my enthusiasm. But recent weeks have played witness to some honest-to-goodness forward movement. I’ll share details in posts to follow, but among other things we’ve recently passed framing, plumbing, mechanical, and electrical rough-in inspections, re-insulated the walls, purchased appliances, ordered cabinets, and started to install wall and ceiling surfaces.

Even under the best of circumstances, though, I’m a slow designer and builder. I’ve accused myself of overdoing things in this forum before, and now I’m going to show you how that plays out, and why the most mundane tasks take me days to complete.

A couple weekends ago, it was finally time to install a cap for the duct to the new hood vent. Here’s how the last guy to renovate our house did it:

old vent

Nice, huh? Cut a hole through the siding, slap a vent cap over it and get back to the serious business of drinking beer. To this day, this vent leaks voluminous quantities of outside air and is no doubt a bug superhighway in the warmer months.

I knew I could do better.  A lot better.

First, the nerve-wracking portion of the project: I cut a hole in the house:

hole in house

I want to be clear that I was NOT drunk when I cut the hole. But, I’m pretty sure the guy who installed the siding on this side of our house was. The hole and the window are both dead level. The siding is anything but. I could have skewed the hole, but I figure we’ll put new (level) siding on this side of the house someday.

Here’s a closer look at the hole. You can see the old white oak framing, the siding directly on the studs, and the blown-in cellulose insulation, undoubtedly the itchiest and dirtiest material known to man.

hole up close

Next, I primed the edges of the exposed siding to seal them against moisture.

primed edges

Without sheathing, there’s nothing to attach a vent to, so I framed a supporting structure just behind the siding.

back framing

With a sturdy frame in place, I flashed the opening. An aluminum drip flashing protrudes over the siding at the bottom of the opening, flexible flashing tape wraps over this flashing and up the sides of the framing. The tape extends underneath another aluminum drip edge at the top of the opening. Working from bottom to top like this establishes a continuous path for water to drain down.

flashing

After flashing, I built a custom wood frame to support the vent and trim out the siding. The frame has a cap with a tapered top and a drip kerf on its bottom side. The frame has thick wood sides that mimic the nearby window trim. I primed it on every surface and put it in place with stainless steel screws.

frame

With the frame firmly affixed, it was finally time to install the vent cap. I ordered a copper cap with a damper and a bird screen. Yes, I could have bought a flimsy galvanized vent at the home center for significantly less money, but this one will last a bazillion years and look good doing it. I put a thick bead of caulk along the top and sides of the rear of the cap, but not along the bottom to allow any incidental water to drain. The cap was screwed in place with brass screws.

caulk vent

installed vent

After caulking the gap between the wood frame and the siding, I applied two coats of paint. I think it looks pretty good and it’ll keep looking better as it weathers from orange to brown to verdigris.

complete

And that’s how I translate a job that took the last guy a couple hours into a weekend-long project.

A missed American moment

Last weekend, I finally admitted to myself that the foot-tall grass in our lawn was out of hand rather than attractively scruffy. Once you start mowing in North Carolina you don’t quit until late fall, so I push off the first pass until as late in the spring as possible.

When we moved into the Ordinary House, we hired a lawn service. They did a passable job, but their riding mowers left muddy divots in the grass and their schedule was erratic. When I realized that we were paying hundreds of dollars a month for mediocre work that I could do myself, my self-reliant streak kicked in. I dusted off my old push mower and spent hour after hour pushing it across our three-quarter acre lot. The results were good, but the job was a time sink and took my attention away from  more pressing projects, like that kitchen that I’m supposedly building.

This year, I promised myself that I would let my tightwad shield down just long enough to buy an expensive mower. Even so, I resisted that purchase until last weekend, when I walked into Home Depot and saw the model I’d been ogling on super-sale. Half an hour later, I was walking behind it my yard.

Yup, you read that right: walking behind it. I’m sure you’re wondering: 3/4 of an acre and you didn’t buy a riding mower? What kind of American are you?

Problem is, our yard has enough corners, flower beds and other obstacles that I’d spend an hour going behind the riding mower with a push mower. The mower I bought is a 30″ self-propelled push model by Toro, called the Time Master.  It’s  maneuverable enough to do most of the detail work, but has 9″ more deck width than my old mower, which doesn’t sound like much until you realize that those extra inches decrease mowing time by nearly 40%.

toro timemaster width

The mower is very heavy, weighing in at nearly 200 pounds, but the self-propelled transmission pulls it at any pace, from a crawl to a trot. The blades are engaged separately from the engine, so you can move a stick or dog toy out of your way without turning the machine completely off.   It’ll bag or mulch or discharge to the side. And although it’s large, the push handle folds up while it’s in storage, so it actually takes up less floor space than the smaller mower.

toro timemaster storage

The Time Master took some getting used to.  It felt cumbersome at first, but after an hour I got the hang of it. Though I admit the idea of a riding mower with a cup holder is appealing, I think this is the right choice for our yard.  The mower does the job relatively quickly, it can be stored in the shed we already have, and we spent far less money than we would have to get a riding model.

Now that I’ve mowed once, it’ll be a weekly chore through October.  Twenty-six weeks of pushing will be the true test of my positive first impressions.


The *award-winning* ordinary house

259 years old and still charming ’em…we can all hope to age so well.

I’m proud to report that our initial efforts to breathe new life into the Ordinary House were recognized by the Town of Hillsborough last Friday when we received a 2013 Preservation Award for “The Preservation of a Historic Exterior”.

preservation award

I joked that if anybody knew how long the remaining to-do list for the exterior was, they might have waited another decade before praising our accomplishments. Nevertheless, it’s very gratifying to know that people are watching our progress and consider it worthy of recognition. Check out my interview with WCHL in Chapel Hill about the award here.

To everyone who has stopped by to lend advice, tell a story, or just say “attaboy” – thank you. The acceptance and support that we’ve received from our new neighbors and friends has made our labors seem worthwhile and have shown us just how friendly Hillsborough is.

We’ve only been at this for nine months and we’re only getting started, so I hope that you’ll continue to follow along as we delve into the next phase of renovations, beginning with the kitchen.

Congratulations also to Sandy McBride and Kim Richardson, and Mark and Jennifer Soloman for their awards  – we’re in good company!

preservation award ceremony

Jewelry for houses

Shutters are like jewelry for houses.

They serve a myriad of useful purposes when they’re functional. A closed shutter blocks searing sun, howling winds and pelting rains, insulates in the winter and deflects prying eyes year round. Stroll through nearly any Mediterranean village and the shutters on the buildings express the rhythms of daily life, the weather, and the mood of the people inside. I envy the European appreciation for shutters, because ours have largely been replaced by non-functioning replicas of the real thing. Done right though, even non-functional shutters add a layer of decorative detail and texture to a house that’s hard to achieve otherwise.

nimes

Our home was not spared the indignity of a fake shutter installation during its long life. When we bought the place, the shutters were screwed directly to the window casings. Unfortunately, this is the typical installation detail for shutters these days, and is so ubiquitous that it seems normal. When our shutters were removed to be painted, I vowed that they would not go back up unless we did it the right way.

By “right way” I mean mounting the shutters so that they appear functional, even if they aren’t. The windows on our house are protected by aluminum storm windows, which prevent shutters from closing fully. Even so, we invested in cast iron shutter hinges to mount the shutters back to the house. These L-shaped hinges provide a number of benefits over the typical screwed-on shutter installation. They push the shutters off the house, allowing for ventilation and drainage behind the shutter and reducing deterioration of the paint there. They make removal of the shutters a simple matter of lifting them off, rather than tediously unscrewing them. This will make future paint jobs easier. And lastly, the raised mounting position casts deep, attractive shadows on the face of the house, an aesthetic side effect that’s lost when shutters are screwed directly to the siding.

shutter hinge

The other piece of essential shutter hardware are tie-backs or shutter dogs. These pivoting metal plates hold the shutters open and keep them from moving in the wind. Shutter dogs come in a huge variety of shapes and sizes, from the familiar S-shape to intricate cast seashells. For our house, I selected a tapered tieback with a curled bottom edge. This simple shutter dog seemed suited to the subdued colonial architecture of our home.

shutter dog

Aside from the absence of shutter hardware, shutter installations are marred by a number of common faux pas. Attention to a few obvious details can mean the difference between a beautiful and convincing shutter installation and one that is clearly fake.  Among the rules to observe:

  • Install shutters with a size and shape that would allow them to cover the window opening fully when shut. This sounds obvious, but drive around nearly any neighborhood and count how many five foot wide picture windows you find that are flanked by twelve inch wide shutters: you’ll need more than two hands.
  • Install shutters so that they’d fit tightly in the window opening. Shutters installed this way will sit on the window trim, not on the siding. While you’re out counting wide windows with skinny shutters, observe how many of those shutters sit on the siding next to the window trim, not on it. You’ll to run out of fingers and toes.
  • Install  louvered shutters with the leading edge of the louvers facing up and out when they’re open. This way, when shut, the louvers would drain water to the outside, away from the window. Since most shutters are permanently affixed in place, it’s surprising how many people think the this mounting orientation is backwards. In fact, almost every vinyl shutter out there is manufactured with louvers that shed outward in the “open” position.
  • Install shutters on both sides of the window opening even if there’s something in the way, like a chimney. If the shutter doesn’t open flat to the house, that’s okay; that’s part of the appeal of a real shutter installation. Half of a pair of shutters never did a window any good.
  • Install shutters at every opening.

That last rule is the only one that we didn’t observe. For now, we’ve only mounted shutters on the King Street side of the house. Over time, I hope to put them at every opening, as they would have been in the past. Until then, I’m pleased that even if our shutters can’t close, they could.

shutters2

Mind in the gutter(s)

When it came time to paint, we piled on the financial pain by electing to replace gutters at the same time. It would have been nearly impossible to get a good coat of paint on the eaves of the roof if they’d been left in place. And since we anted up for an A+ paint job, skimping on one of the most vulnerable portions of the house would have been foolish.

The original gutters were galvanized steel half-rounds that had been painted white. The paint was peeling and the metal was beginning to rust through badly enough that one of the downspouts at the front of the house shot a geyser of water horizontally onto the front porch every time it rained. I don’t believe in steel gutters. They’re strong, but their zinc coating eventually breaks down in the continual presence of water. Leaky or badly installed gutters are worse than no gutters at all. They concentrate the flow of hundreds of gallons of water in a heavy rain – delivered to the wrong place, this amount of water can cause a lot of damage very quickly.

Just before the painters arrived, I had the gutter guys come pull down the old half-rounds.  They ended up in a pile on the front lawn where their deteriorated state was even more obvious.

gutter pile

Aside from allowing the painters to apply a good layer of paint to the roof eaves, removing the gutters exposed several areas of rotted wood and a couple of squirrel entry points to the attic. Some lengths of the 1750s crown molding had succumbed to 250 years of continual exposure to the weather. We had replacement trim custom milled using sections of the old profiles as a template.

With the painters hard at work outside, I was inside wracking my brain to devise an attachment method for our new gutters. Because the eaves of the roof have deep crown moldings, installing gutters wasn’t straightforward like it is when there’s a flat fascia to screw into. The old ones were attached with metal strap hangers that were nailed directly to the roof sheathing below the shingles. The only good time to replace strap hangers is when you’re replacing a roof and all the shingles have been torn off. Our roof was replaced a little over a year ago, so I didn’t want to mess with it. One contractor I interviewed had no shame and suggested tearing off the crown and replacing it with a 2×4 since “nobody’d ever know”. Needless to say, that gentleman didn’t get the job. Another suggested using these strange looking hangers:

#6 shank

The tabs at the back of these hangers bend to hold the hanger vertically against the trim.  But using these hangers presumes that you have solid wood backing behind the crown. The trim on our house is nailed in place with nothing behind it, so screwing hangers to it would have risked damaging the wood and would have resulted in a flimsy connection.

With no attachment solution after several weeks of head-scratching, I stumbled across a product sold by Classic Gutters Systems in Kalamazoo, Michigan.  They sell a stainless steel rod hanger that turned out to be a perfect fit for our circumstances. The rods are a stout 3/16″ thick and are crafted of stainless steel, so they’ll never rust. One end of the rod is threaded for attaching a concealed gutter bracket with a couple of stainless steel nuts. The other end is flattened and has two holes for screwing the rod to the roof.

Using a special bending tool that I rented from Classic Gutters, the contractor bent each hanger to the pitch of the roof, tucked the flattened end of the rod under the second row of shingles and attached it with a pair of stainless steel pan-head screws with a very low head profile. Since the penetrations are hidden under the shingles, they won’t leak. The rods hold the gutters far enough forward from the roof that they don’t get in the way of the crown molding. Spaced at two foot intervals, the hangers are visible where they extend across the first row of shingles. But since the house is so tall, you have to stand far away to see the them, and I don’t mind them even where they’re visible. Surprisingly, the rods cost less than standard half-round hangers.

gutter rod

Attached to the ends of the rods are aluminum brackets that nest inside the gutter, supported by a pair of nuts. Adjusting the level of the nuts up or down allows the installer to pitch the gutters toward the downspouts.

The gutters are 6″ white aluminum half-rounds with 4″ round downspouts. They’re big enough to channel water away quickly and are less susceptible to clogging than smaller profiles. The aluminum won’t rust through and the support rods are extremely strong, so I expect the installation to last at least the lifetime of the roof.

finished gutters

Replacing the gutters was the right thing to do. The old ones would have looked positively awful against the fresh paint job, and the new ones will prolong the longevity of the paint. Our gutter man was a good sport about the installation, even though the hangers were a bit tedious. It took a few days longer than he anticipated, but we both feel good about the end result.