Sitting in an orientation session before my freshman year at college, I clearly remember the senior advisor exhorting her wide-eyed audience to get involved in any activities or groups that interested us, even if we didn’t feel fully qualified for them. She told us how she’d never considered herself an athlete because she didn’t play sports, but then remembered that she’d been to the gym every day for three years. If that didn’t make her an athlete, she asked, what did?
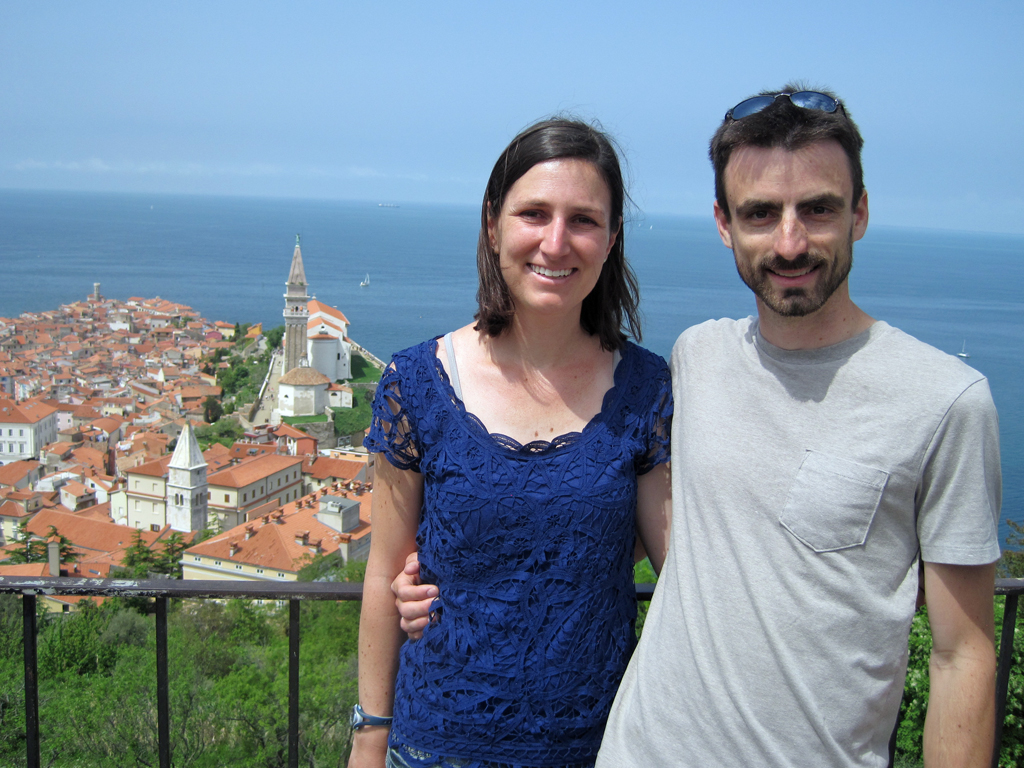
I had a similar revelation recently when I realized that Weezie and I have traveled overseas together six times, and have only know each other for six years. I’ve never considered myself a “traveler”, but I think we’re both deserving of the title with so many miles under our belts. Since 2007, we’ve been to the Netherlands, Italy, Spain, France twice and now Croatia (or, Hvratska, as the locals call it), Slovenia and Bosnia.
We’re low-maintenance travelers (no zip-off pants, jammy packs or checked luggage for us), and we get a little better at at it each time we fly away. This year we learned that when we rent a car, things go more smoothly when we’re being guided by a brilliant offline GPS app for smart phones called CoPilot Live HD. On other trips, I’ve had the road atlas thrown at me on more than one occasion after taking the second exit off the roundabout instead of the third (a tip for future honeymooners: sit on the beach).
The best thing about travel is that it rewards you three times: before the trip with excited anticipation, during it with new experiences, and afterwards with good memories. And time away from home makes you appreciate what you have there. This was our first trip since we’ve lived in Hillsborough and though we would’ve gladly hung around in Slovenia for a few more days (weeks, months…), coming back to our beautiful little town and the Ordinary House made reentry into the real world a little bit easier.
While I’m not able to share all 600 of the photos I took, here’s a brief overview of where we went, with some visuals to prove it.
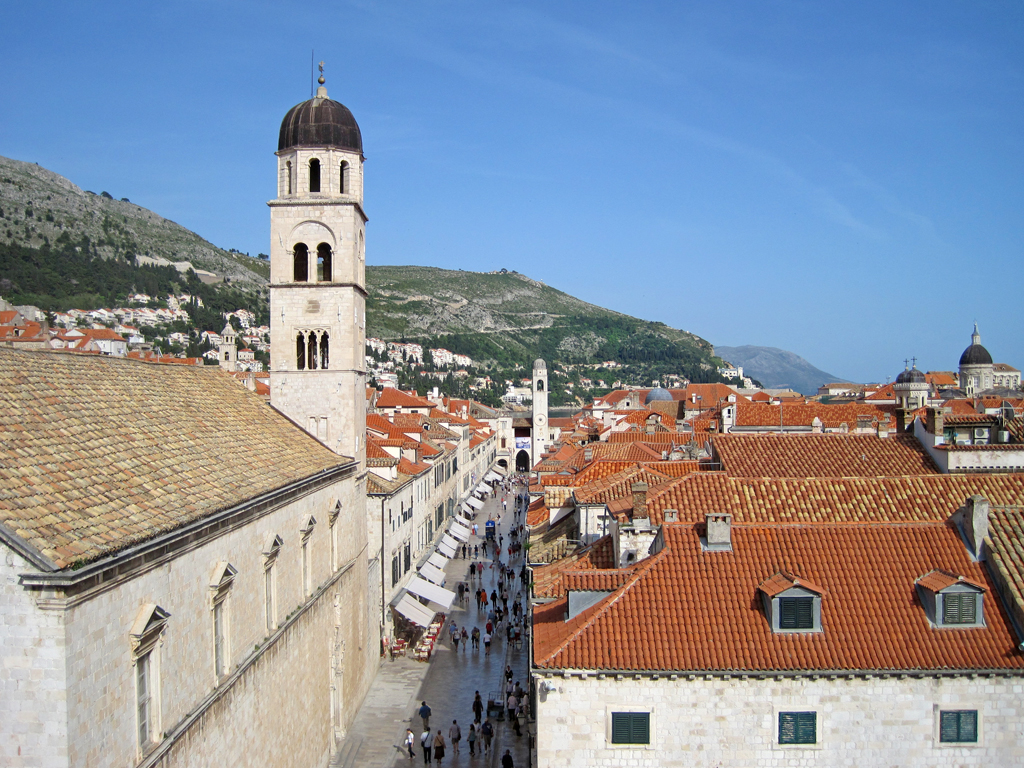
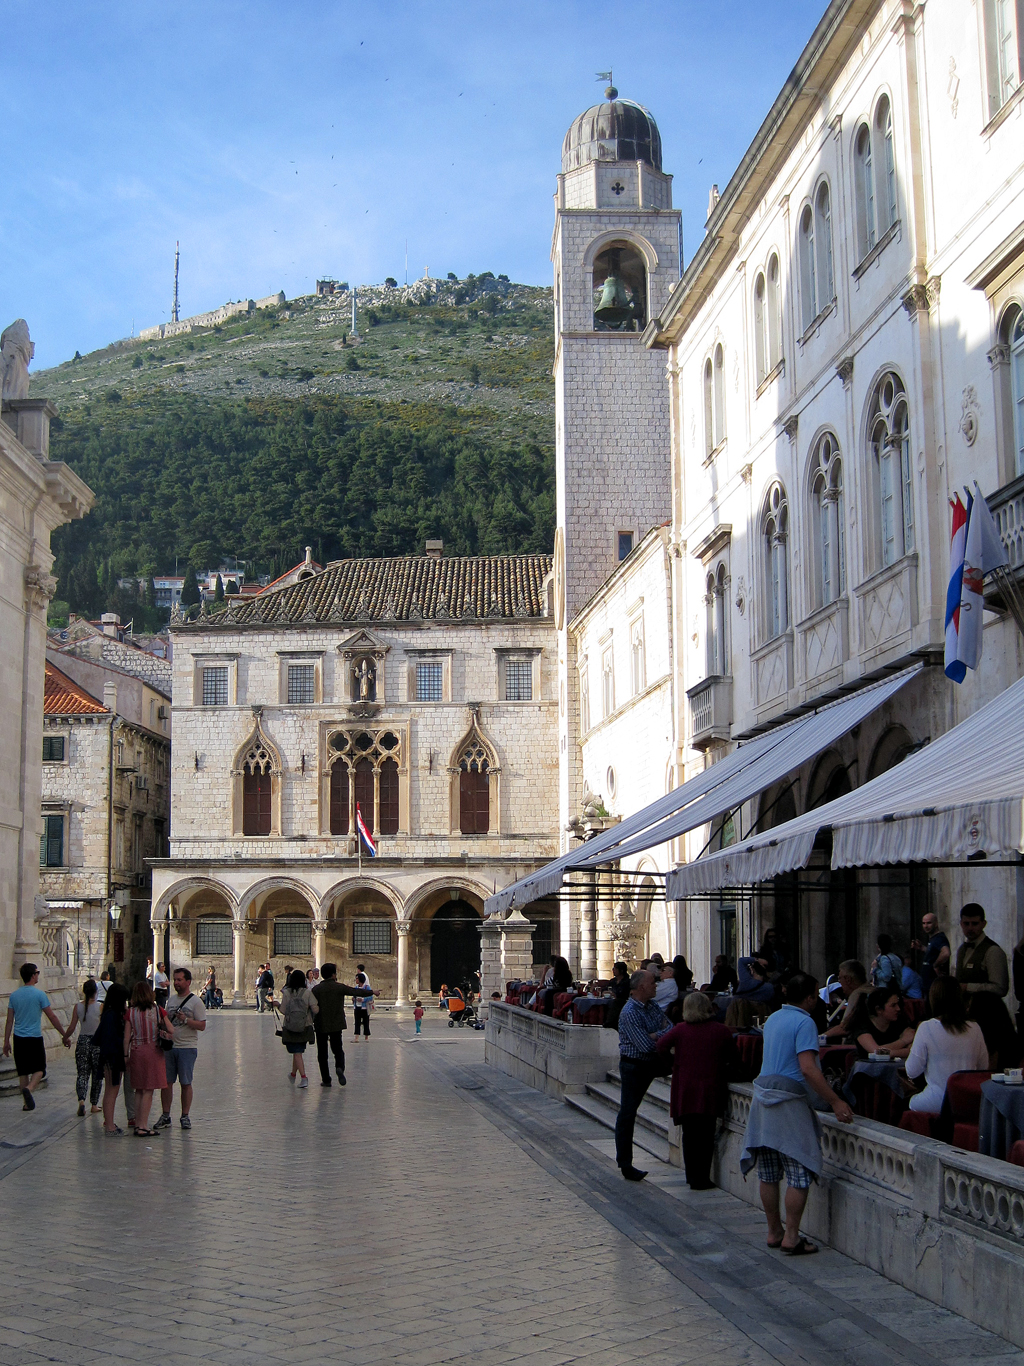
Dubrovnik, Croatia
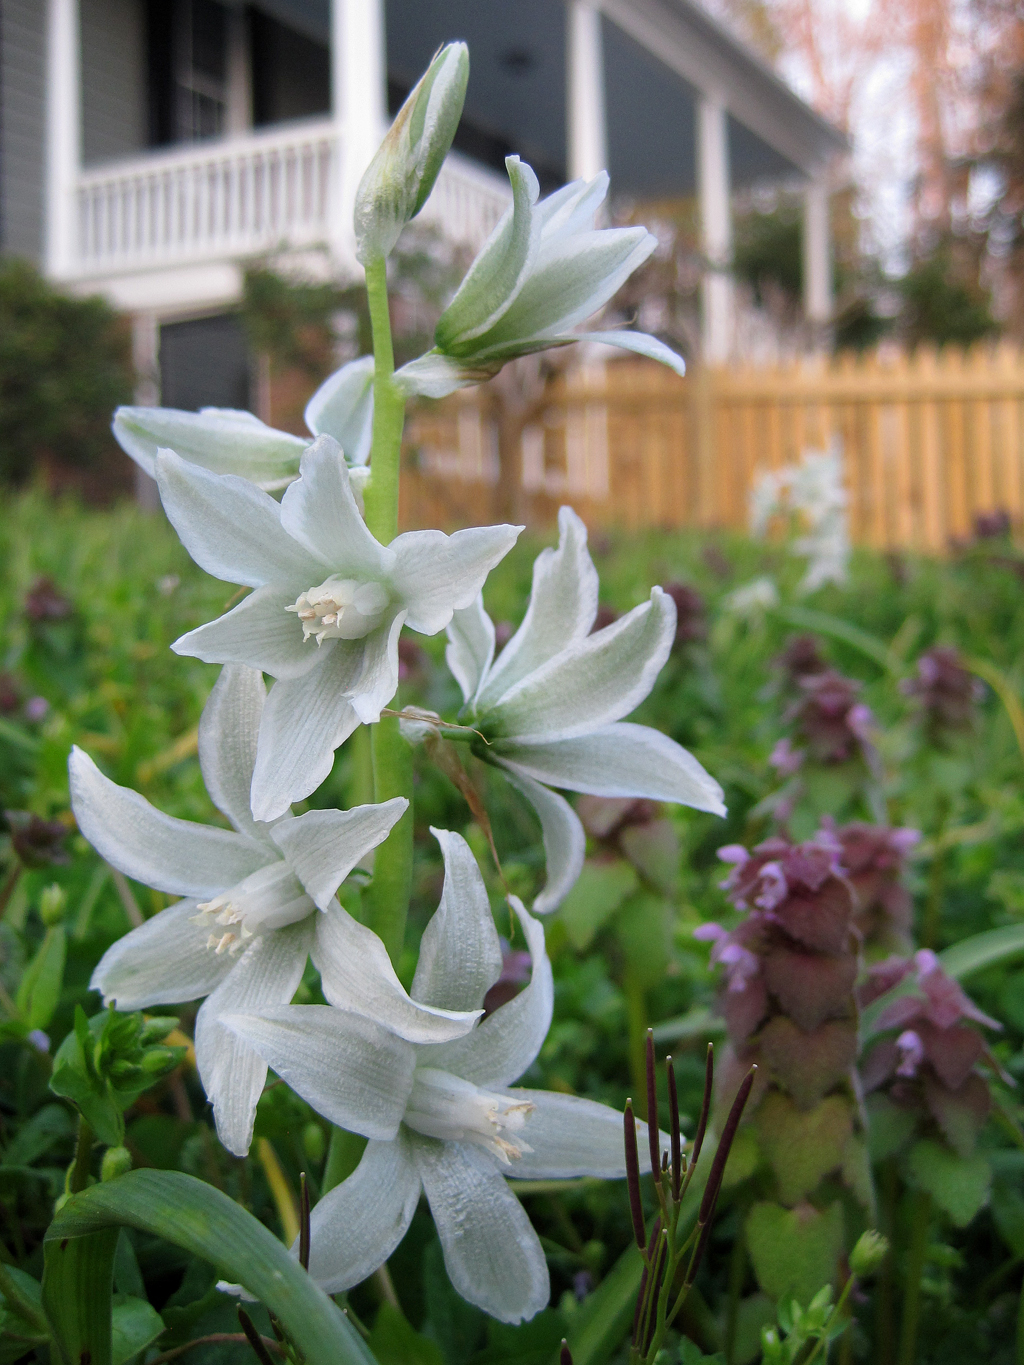
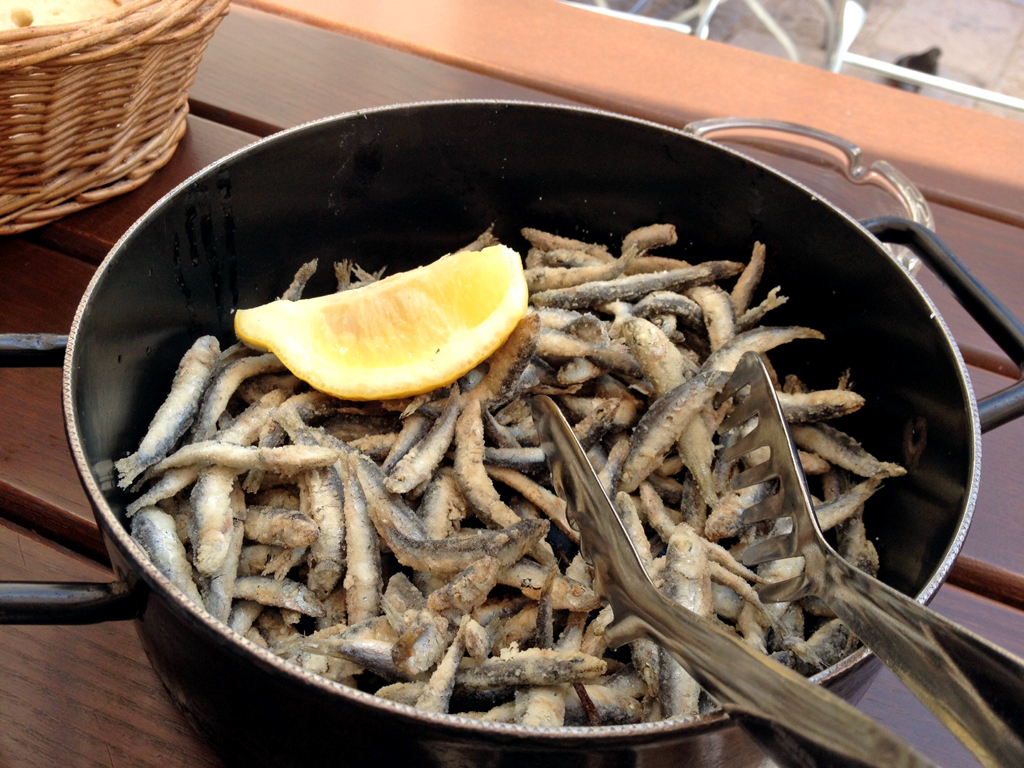
Fun fact: When you order “small fried fish” in Croatia, you’re actually ordering a bucket of fried minnows – see below.
Dubrovnik is well-deserving of its nickname, “Pearl of the Adriatic”. Ringed by 14th century ramparts and paved with marble tiles polished to a shine by visitors’ footsteps, the town draws mobs of tourists from far and wide. If anything, Dubrovnik’s success is also its greatest liability. We learned that there are only around 2,000 year-round residents remaining, and that the population within the town’s walls can grown by more than 10,000 people each day in the summer when cruise ship passengers arrive from their vessels. Even in early May before the summer crush, the crowds were sometimes overwhelming. But the delicious gelato, a cliffside bar called ‘Buza’, and sublime Mediterranean weather made for a fine time nonetheless. We stayed in an apartment in the Old City instead of one of the soulless resort-style hotels that line the nearby peninsula. The only giveaway that this place was at war and under siege only 22 years ago are the new clay roof tiles that top the buildings. Dubrovnik is well worth a visit and is an easy-going introduction to the Balkans.

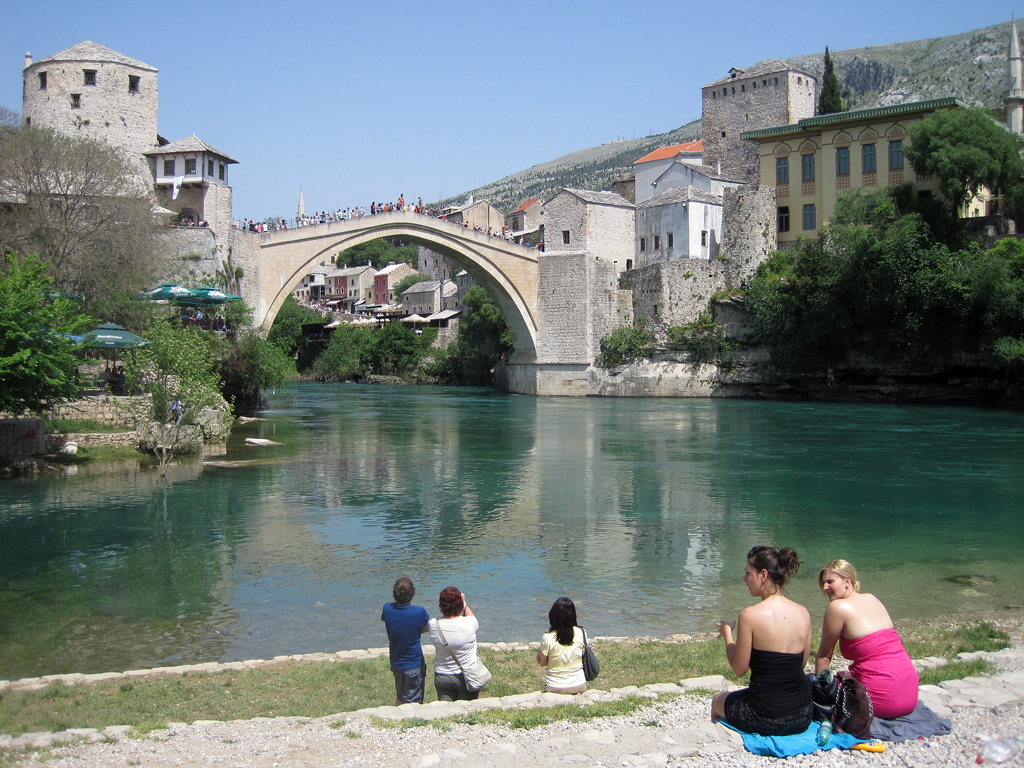
Mostar, Bosnia
Fun fact: To entertain tourists, speedo-clad young men dive from the peak of the Stari Most bridge that spans the Neretva river in the middle of the old town, but only after they’ve collected enough “donations” to boost their courage.
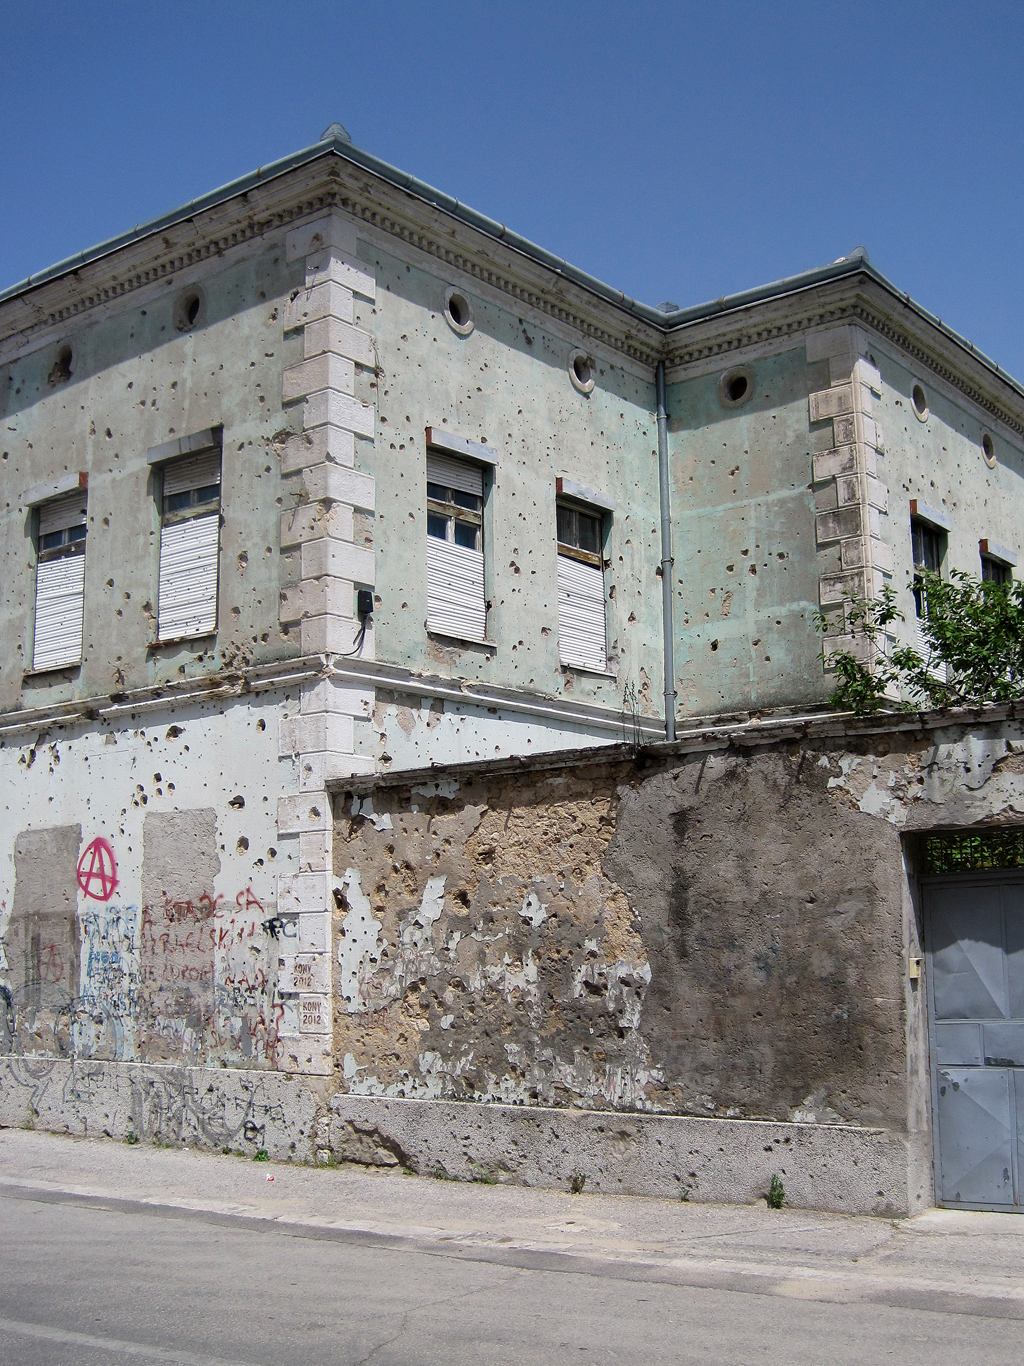
In pursuit of some cultural spice and a semi-exotic visa stamp (which we didn’t get), we detoured into Bonia on our way to our next stop in Croatia. While Dubrovnik’s war damage is nearly imperceptible, it’s all around in Mostar. Shells of bombed out buildings and facades riddled with bullet holes stand only blocks away from the historic center. The main attraction in Mostar is the arched stone Stari Most bridge, destroyed in spectacular fashion during the Bosnian war, but recently rebuilt using the same materials and techniques as in ancient times. Minarets and calls to prayer make Mostar’s Muslim population obvious. The town outside the center is dull and obviously struggling. The border crossing back into Croatia was extremely long and seemed to demonstrate the lingering distrust that exists between the Serbs, Croats and Bosniaks. Despite this delay, I’m glad we made the trip.
Split, Croatia
Fun fact: Much of old town Split (pronounced ‘spleet’) is actually contained within the remnants of the Roman emperor Diocletian’s retirement palace.
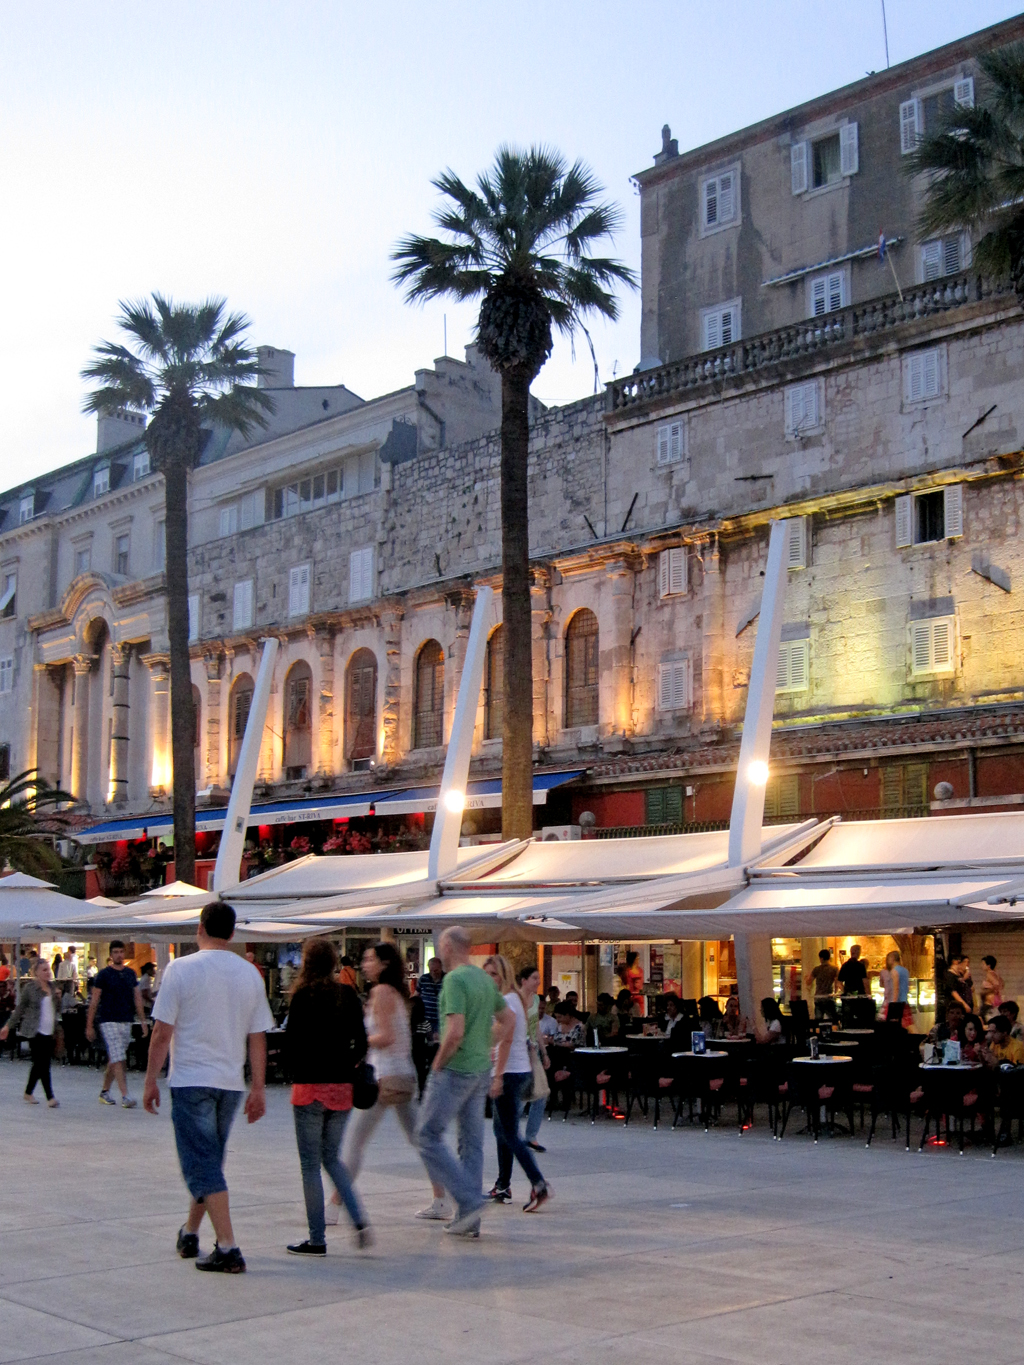
We didn’t leave enough time to explore Split properly, especially since we spent an hour chasing down our hotel receptionist who was having wine with friends at the cafe around the corner. (Note to hoteliers: never, ever close reception and leave a note for your guests to call you at a local number (which requires a calling card and a pay phone) and then tell them to wait while you finish your wine. Ever. It makes those guests VERY grumpy.) While Dubrovnik is something of a museum, Split is a living city built in and around a Roman emperor’s retirement palace. It has a decidedly more cosmopolitain feel than Dubrovnik and is Croatia’s second most populous city after Zagreb. The sea front promenade is abuzz after dark, making it a fun place to hang out in the evening. Even so, this was probably our least favorite stop of the trip.
Plitvice Lakes, Croatia
Fun fact: The first shots of Croatia’s war for independence from Yugoslavia were fired at the Plitvice Lakes when a man shot the park’s police officer.
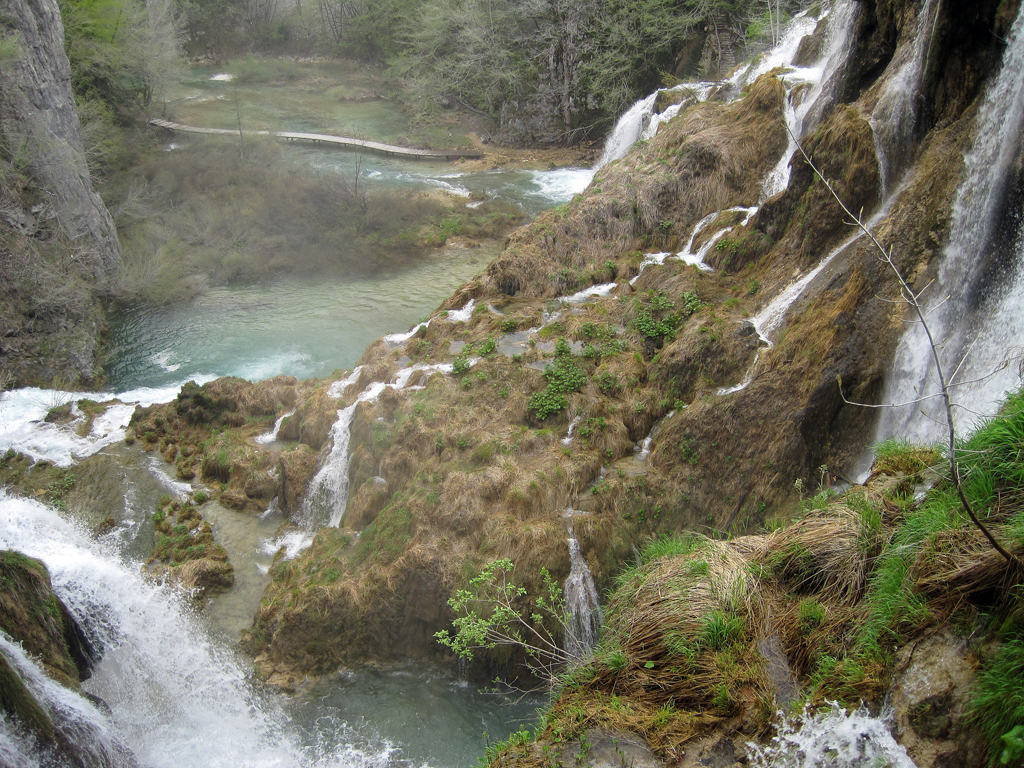
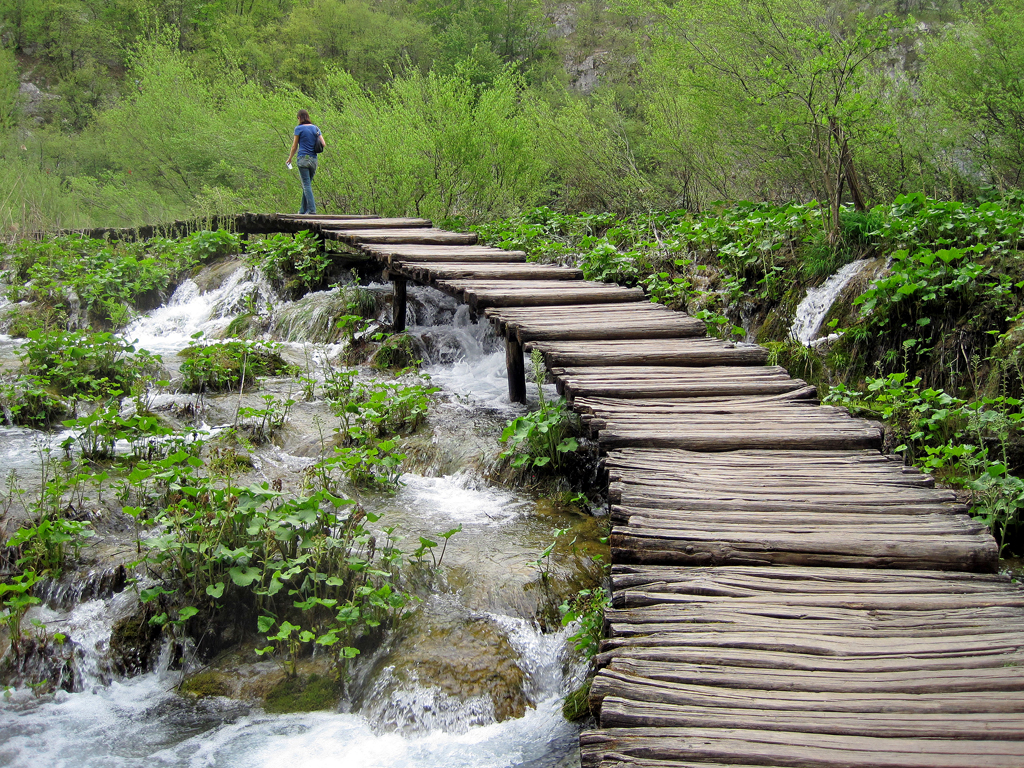
Plitvice is not near anything, but it’s worth driving out of the way to see. A series of lakes that spill into one another in spectacular fashion, this natural wonder has picturesque views at every turn and feels like something out of a Lord of the Rings movie set. Like Dubrovnik, it’s a victim of its own success and is overrun by tourists. Narrow wooden walkways that arc over, around and sometimes through the water give you up close and personal views of the lakes, but make it possible to get stuck behind a slow-moving pack of German tourists who act like they’ve never seen a fish before. We followed the “short” loop, which took around three hours, but went past most of the significant natural highlights. If you go to Plitvice, I’d recommend staying in the area the night before and devoting a solid half day or more to exploration.
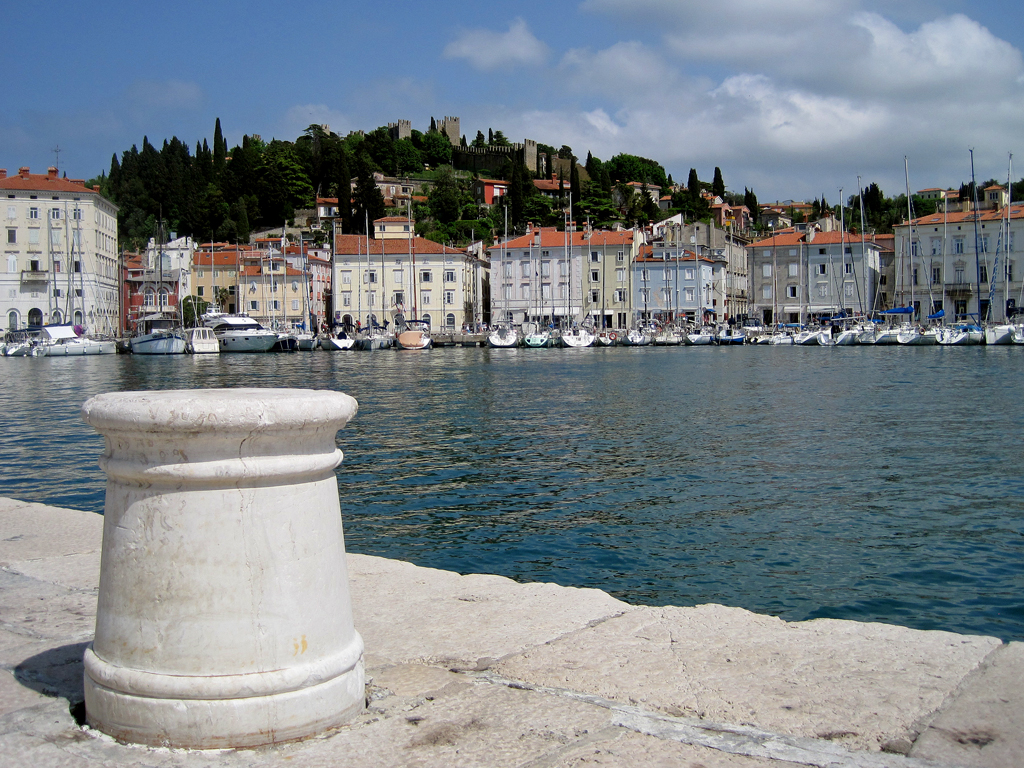
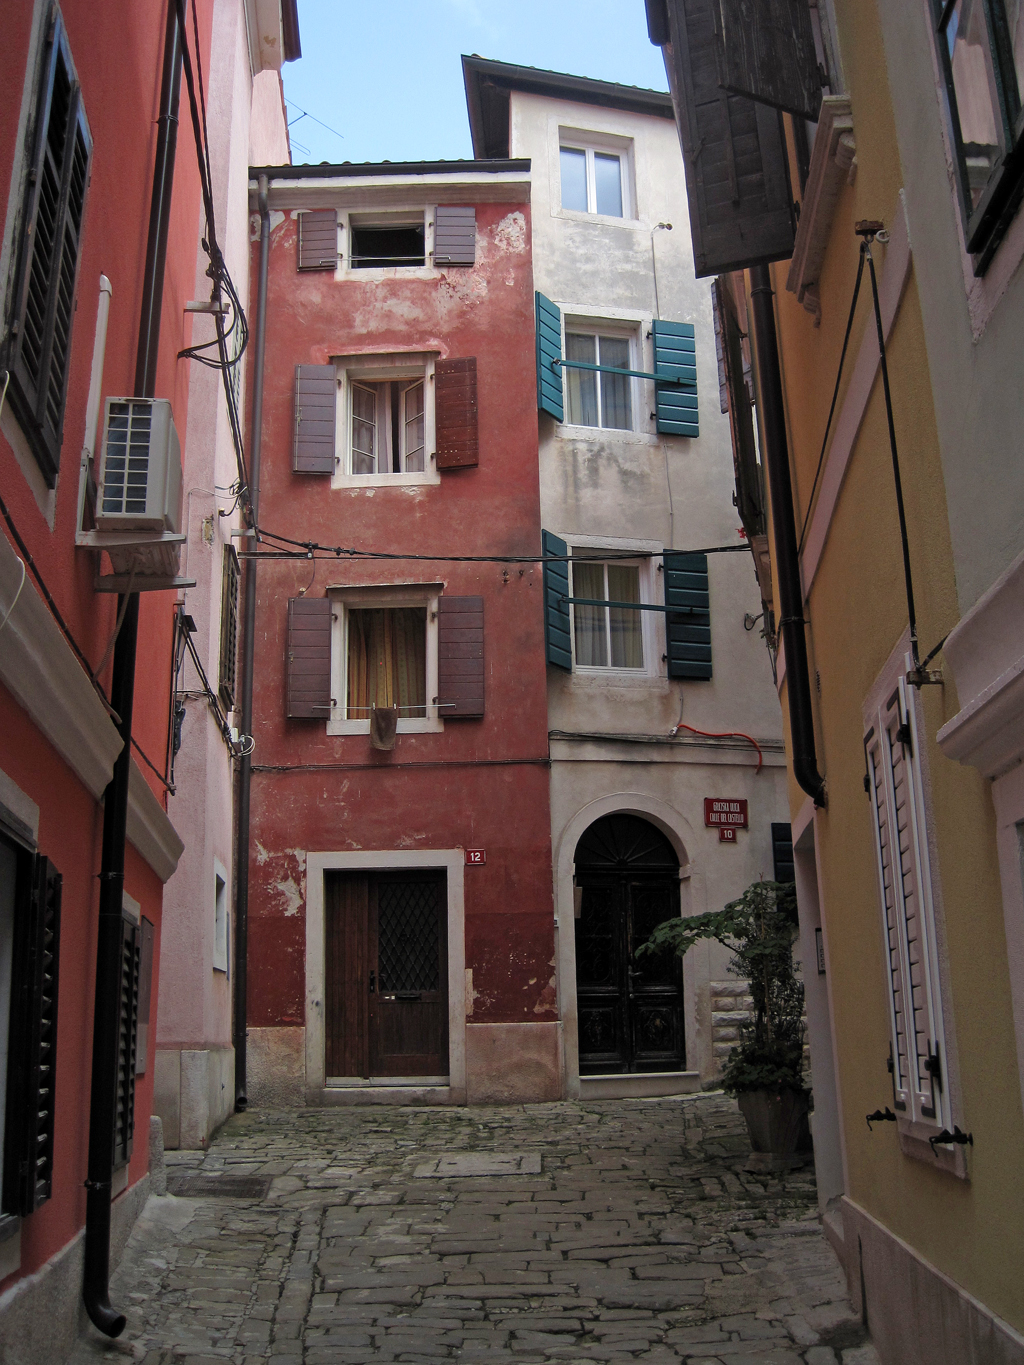
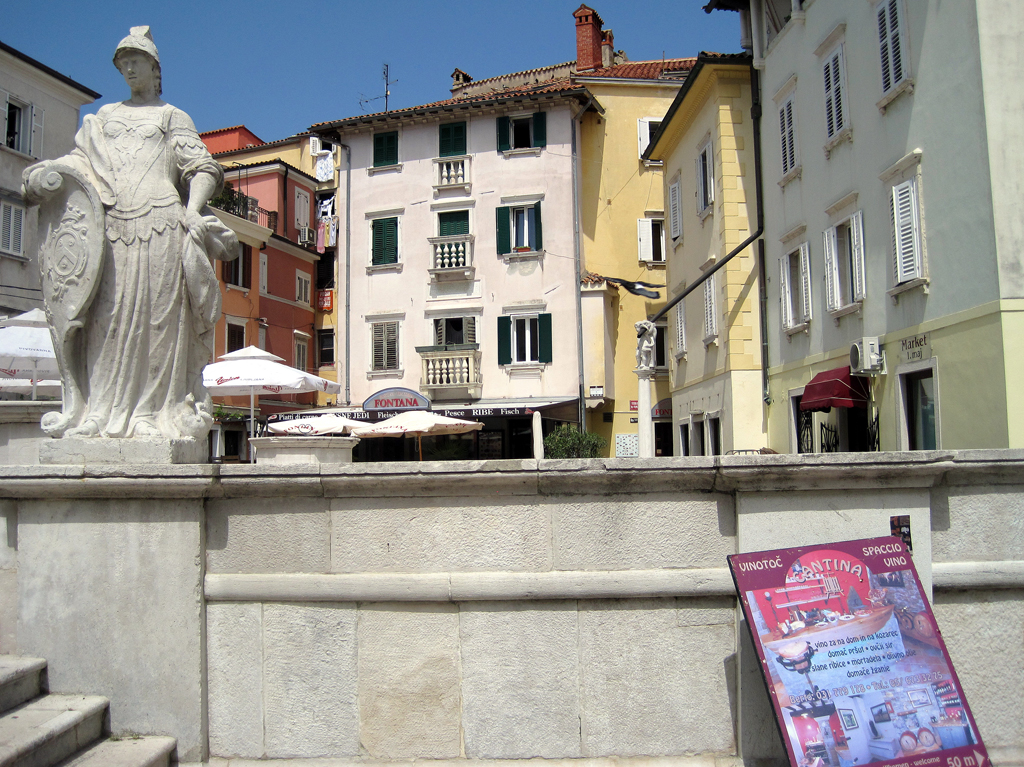
Piran, Slovenia
Fun fact: Piran’s main square (Tartinijev trg) used to be part of the town’s marina, until it began to smell like poo and was filled in.
Piran was our consensus favorite stop of the trip. A tiny town on a peninsula that juts into the Adriatic, it’s the jewel of Slovenia’s short 30 km stretch of coastline. It felt like the Riviera, particularly given the Italian influences in the architecture, but only if that Riviera was run by Germans. The Slovenians seem industrious by European standards. We actually witnessed the closure of a restaurant at 9:30 on a Friday night, which is appetizer time across the Adriatic. Piran’s core is a delightful medieval maze that spills onto the main square, the marina and the seaside promenade that rings the town. Piran is small, and you can walk from one end of town to the other in 15 minutes or so. It has a laid-back vibe that made it easy to relax and enjoy the spring sunshine. Our B&B lent us bikes which we rode through the adjacent tourist town of Portoroz, sort of a Slovenian Myrtle Beach, and further to the Piran salt flats. Here, workers flood low-lying fields in the summer, letting the sun evaporate the water and harvesting the salt left behind by hand. The town provided a needed spot of relaxation in our admittedly ambitious itinerary.
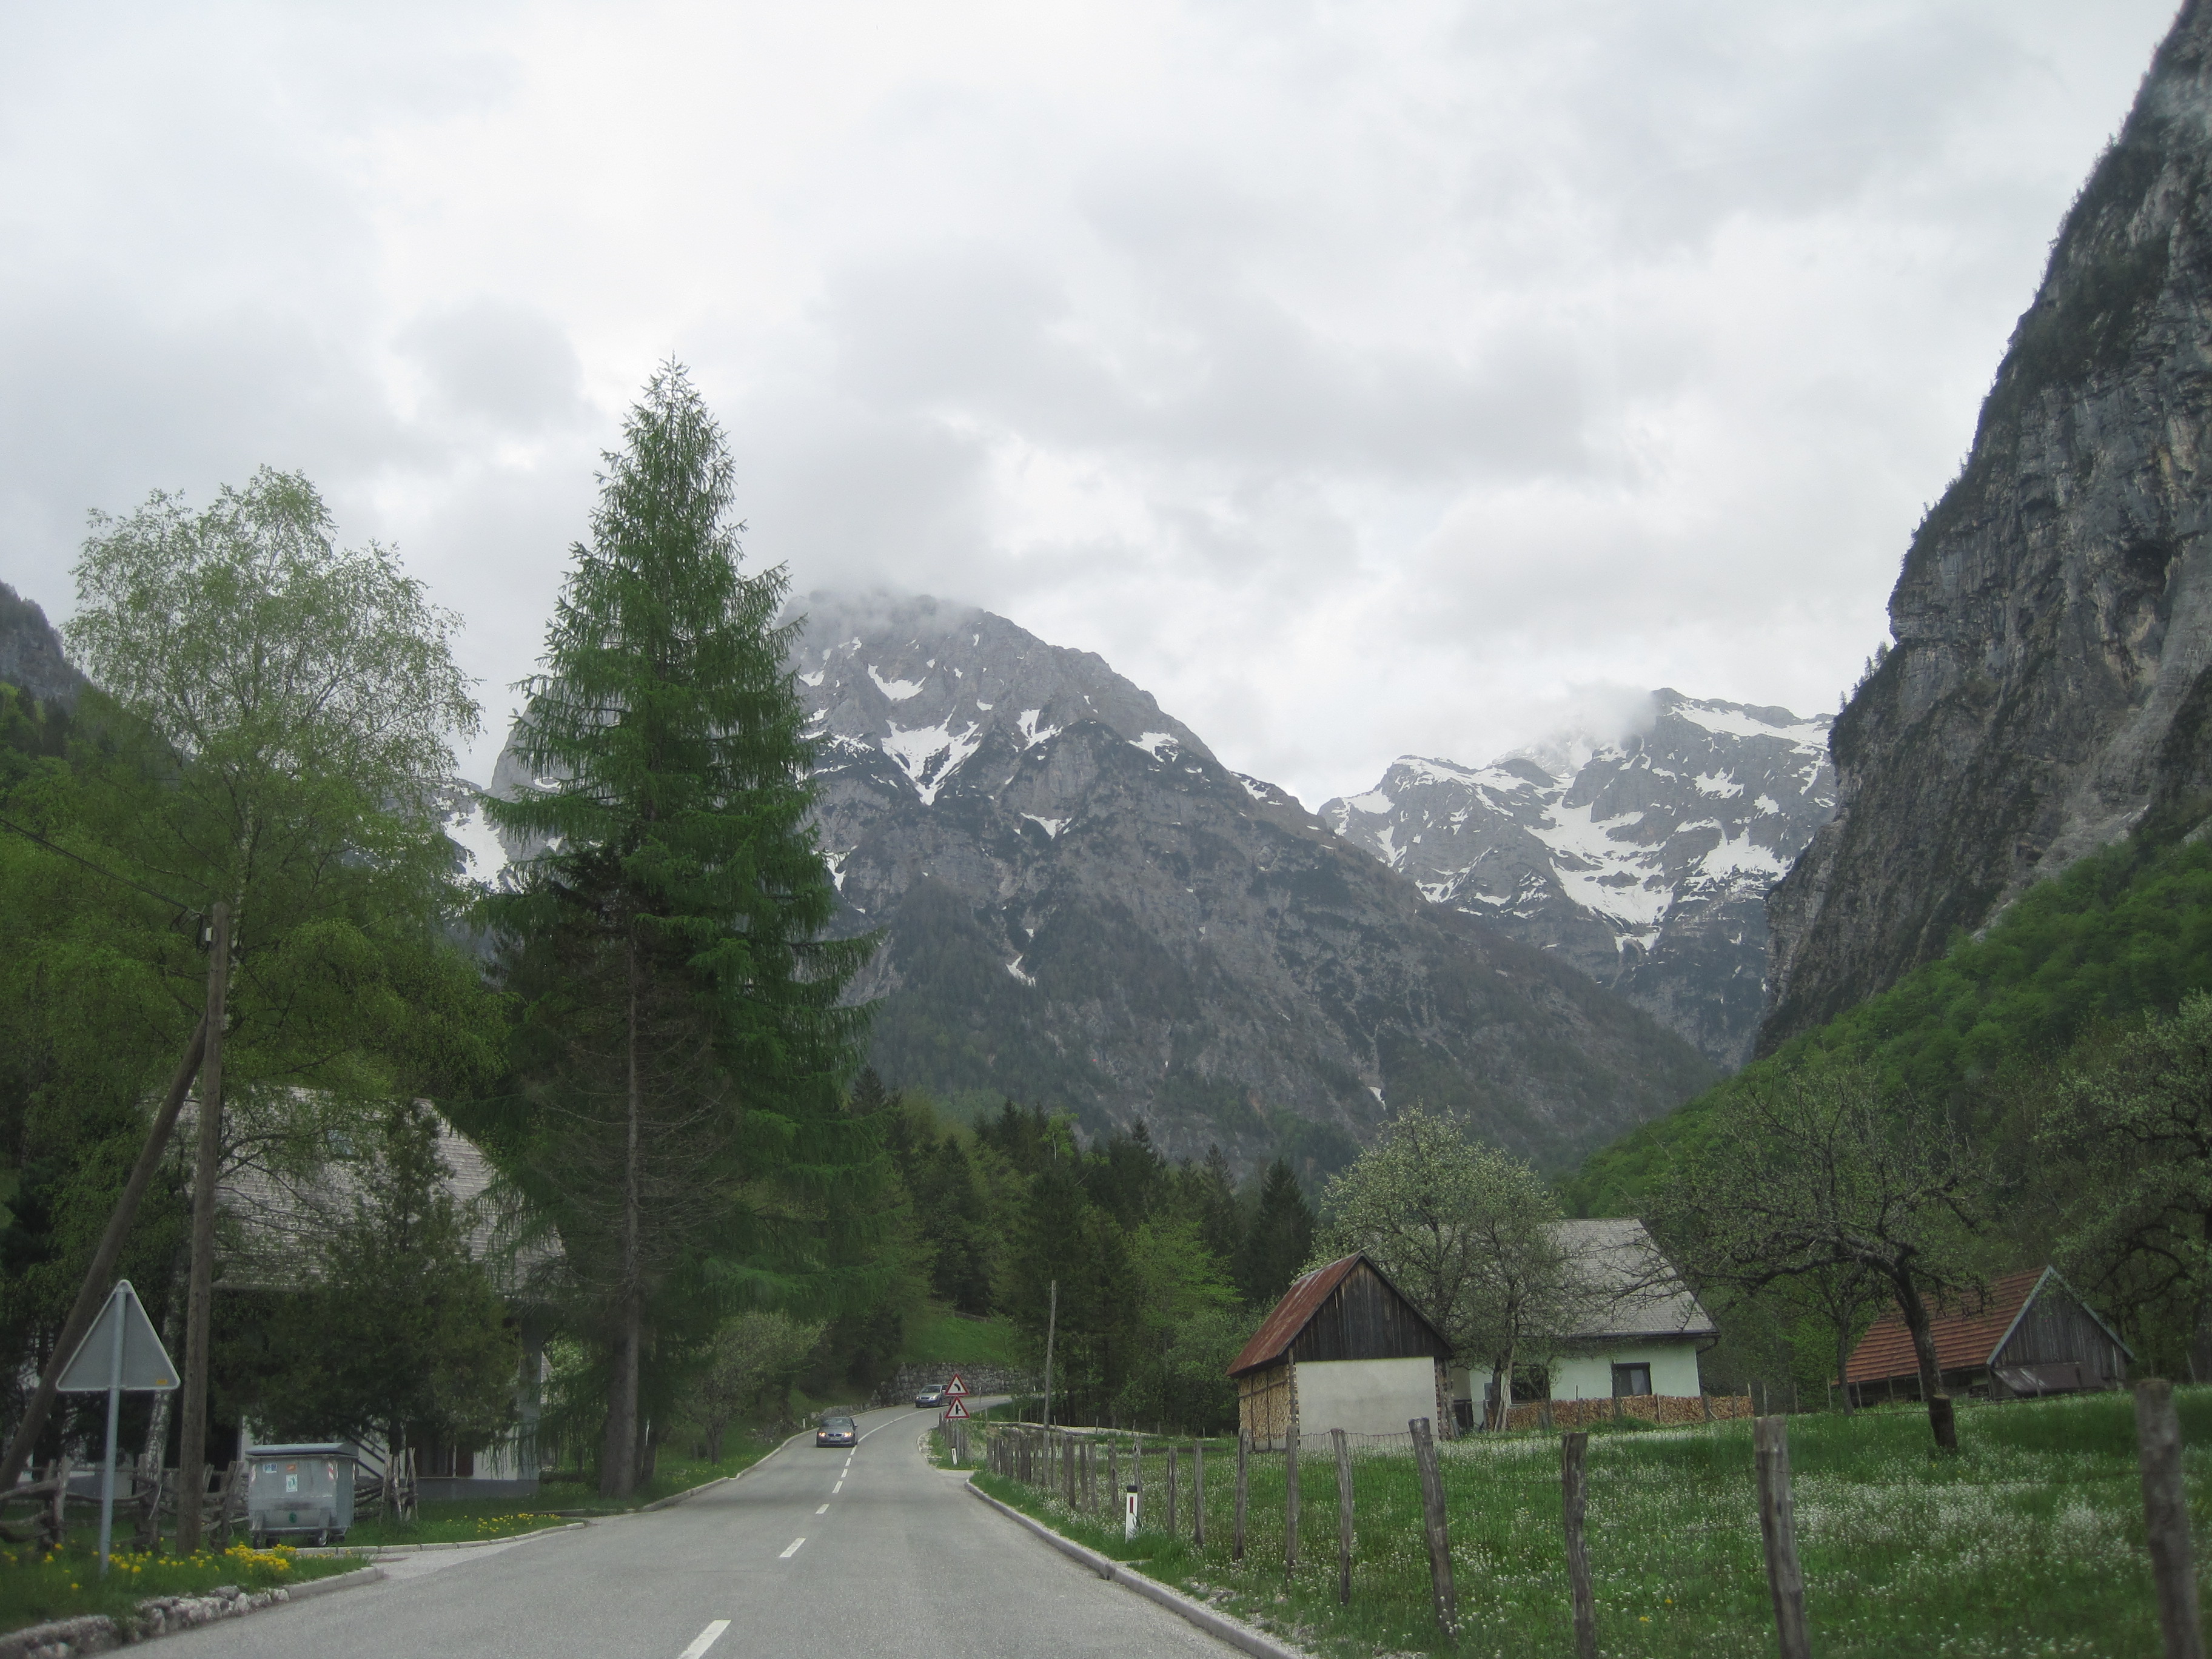
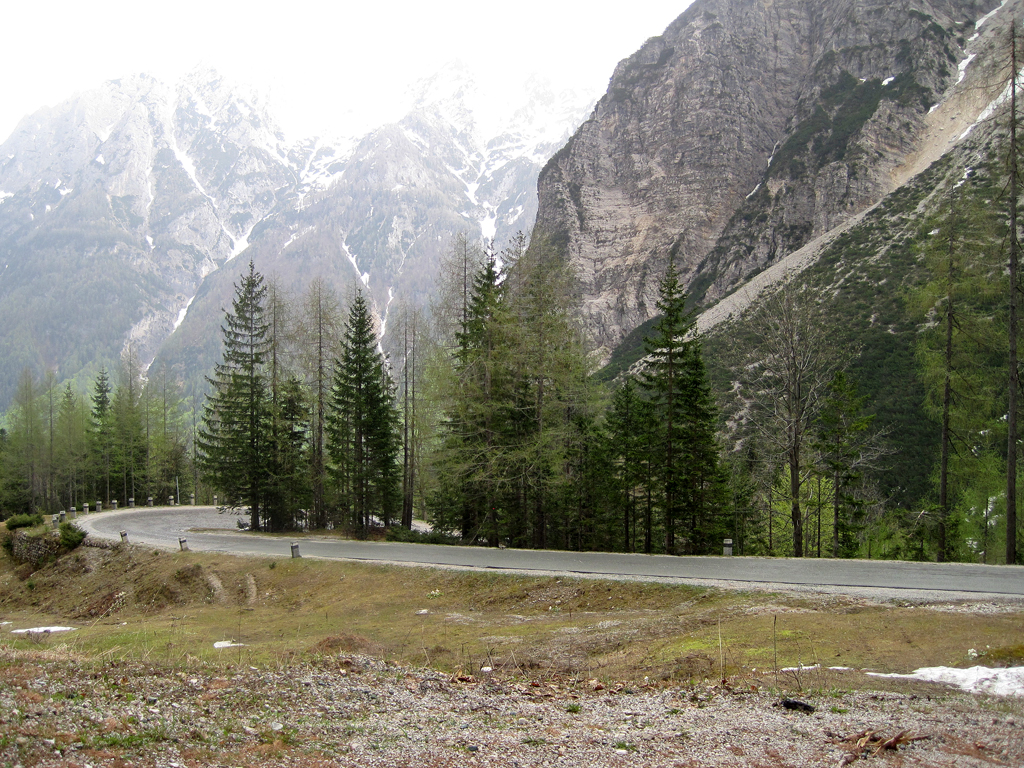
Julian Alps, Slovenia
Fun fact: During World War I, Ernest Hemingway drove an ambulance in these mountains, which was the front line for vicious fighting.
I’m a sucker for a good mountain, so we took the scenic route to our next stop, Lake Bled, by way of the Julian Alps, Slovenia’s small corner of that famous mountain range. We crossed the Vršič Pass, the highest pass in the country, which had only just opened for the warm months. The winding road to the peak has 48 hairpin turns that lead to ever more spectacular scenery as it skirts around Slovenia’s highest peak, Mt. Triglav, named for it’s three distinct peaks. The south side of the pass was sunny and scenic, but the temperature nose-dived as we climbed, and by the top there were snow banks taller than our car piled at the road’s edge. Colorful poles line the road to help plow drivers find the road in inclement weather. The backside of the mountain was stormy and cold, but no less picturesque. Apparently this road was built by Russian POWs in WWI, and there’s a small onion-domed wood church on the way down that commemorates a group of them that were killed in an avalanche. While less impressive than Swiss or Austrian Alps, these mountains were well-worth a three hour detour.

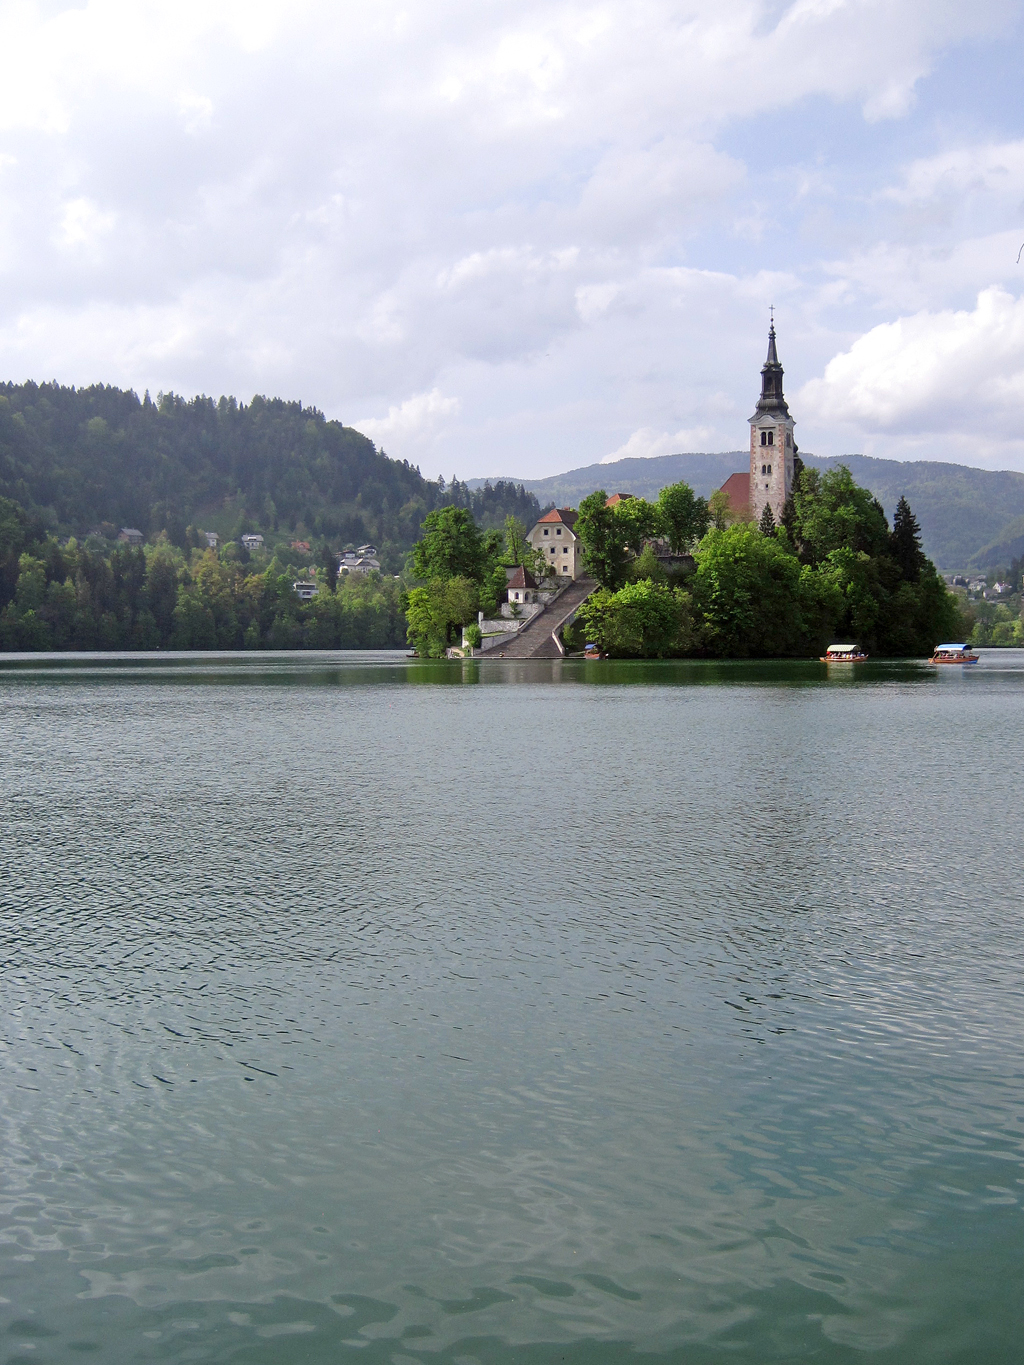
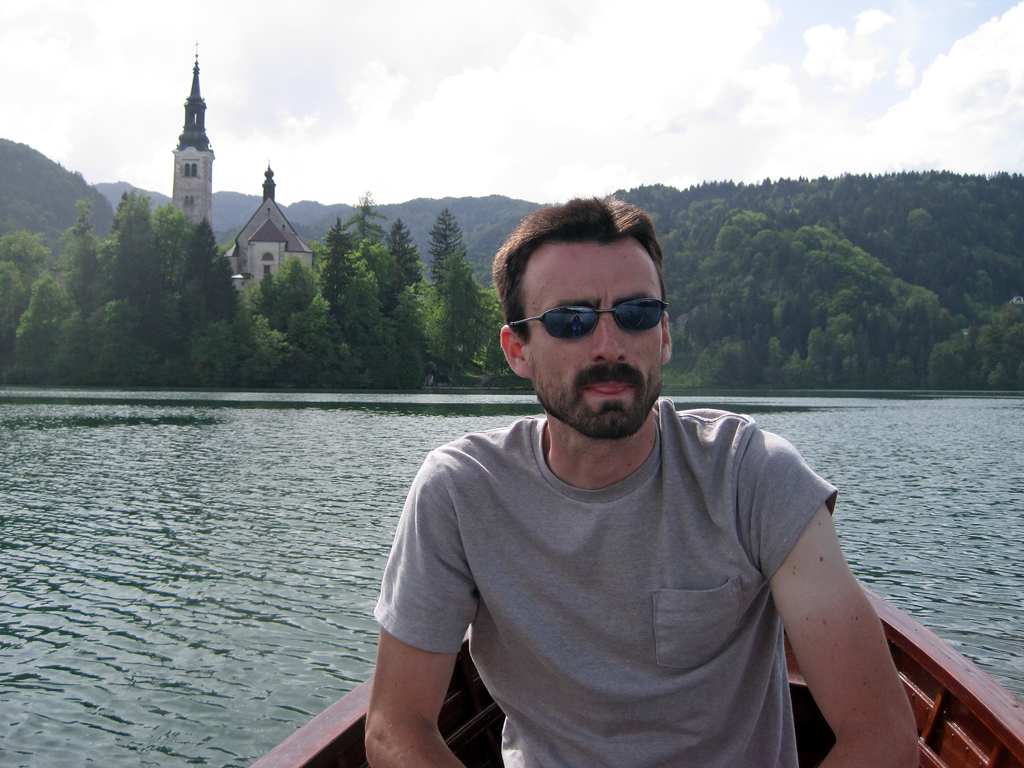
Lake Bled, Slovenia
Fun fact: Slovenian grooms run their brides up the long set of stairs on the island in Lake Bled to prove their worthiness for marriage.
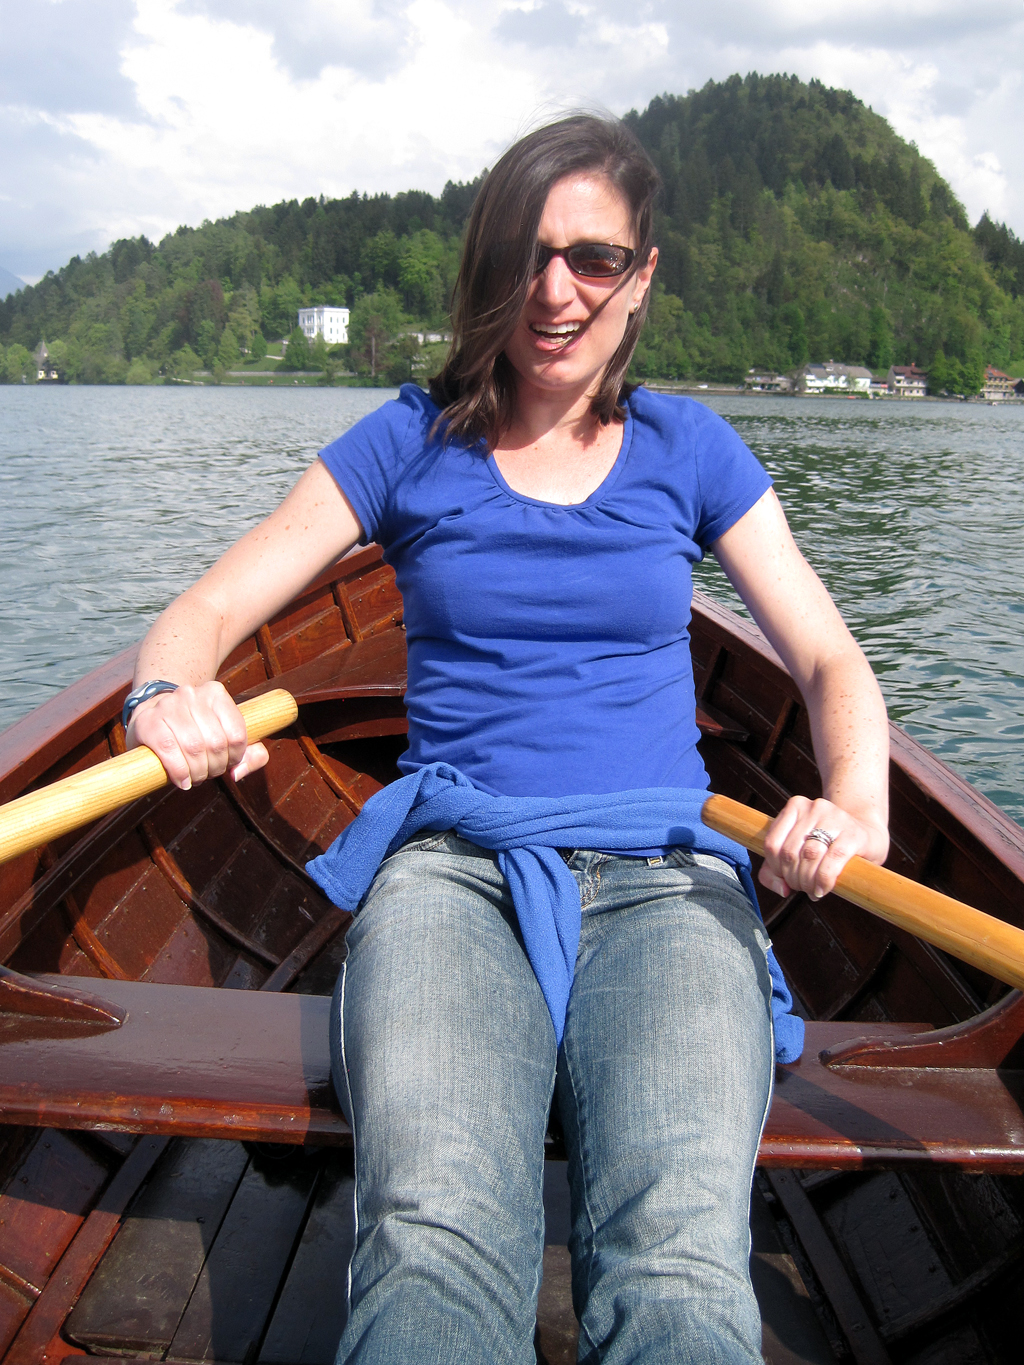
We generally find Rick Steves’ guidebooks to be reliable in their assessment of various European destinations, but Weezie and I both felt like Lake Bled was significantly overhyped. Yes, it’s beautiful, and no, you shouldn’t miss it on a trip to Slovenia, but we only derived a half day’s entertainment from the place. The lake is guarded by a castle and set against the backdrop of the nearby Alps with a fairytale-like island in the middle. The three hour hike around the lake inspires you to take a picture of the same view every 50 meters or so. The surrounding town is mostly dominated by pensions and B&Bs for vacationing Europeans and adds little to the visit. The highlight was our trip to the church-topped island. We elected to avoid the traditional gondola ride, and got there under our own power using a rented rowboat. Once the vendor reminded me that you can’t row facing the front of the boat, we got underway and found ourselves at the island’s shore within 20 minutes, despite my cringe-inducing rowing form. Weezie gave it a try on the return trip, and I’m certain that plenty of Japanese tourists are sitting at home giggling at their pictures of the little white girl being forced to row her man across the lake. Lake Bled is probably best when used as a jumping-off point for outdoor adventures in the nearby mountains.
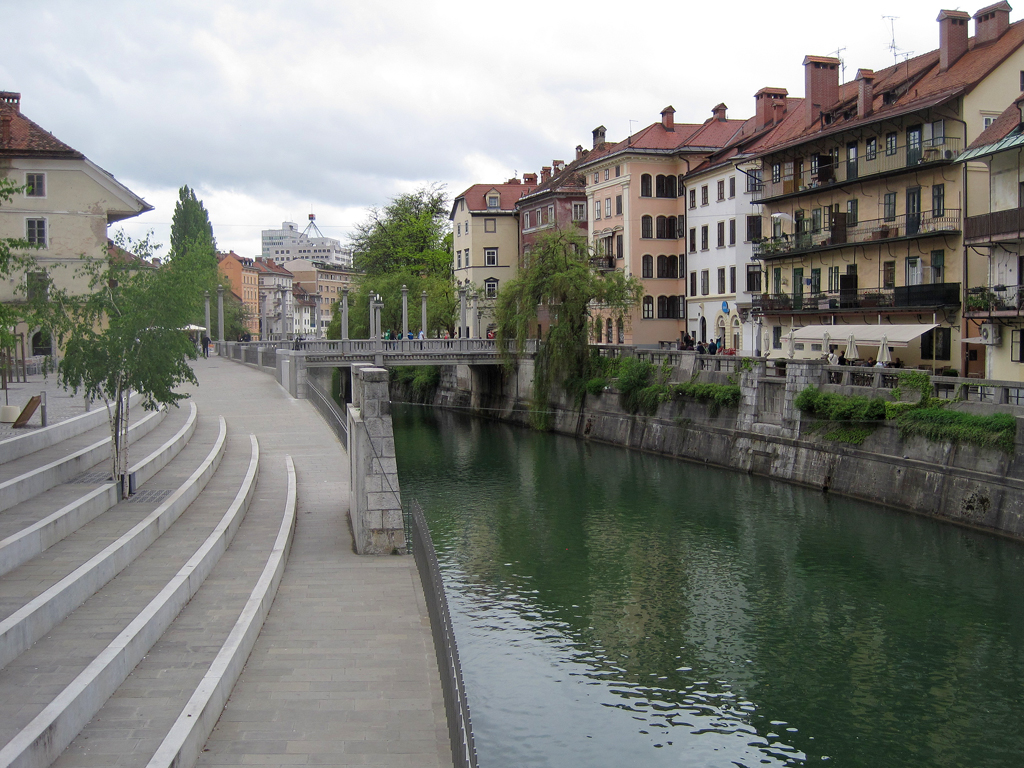
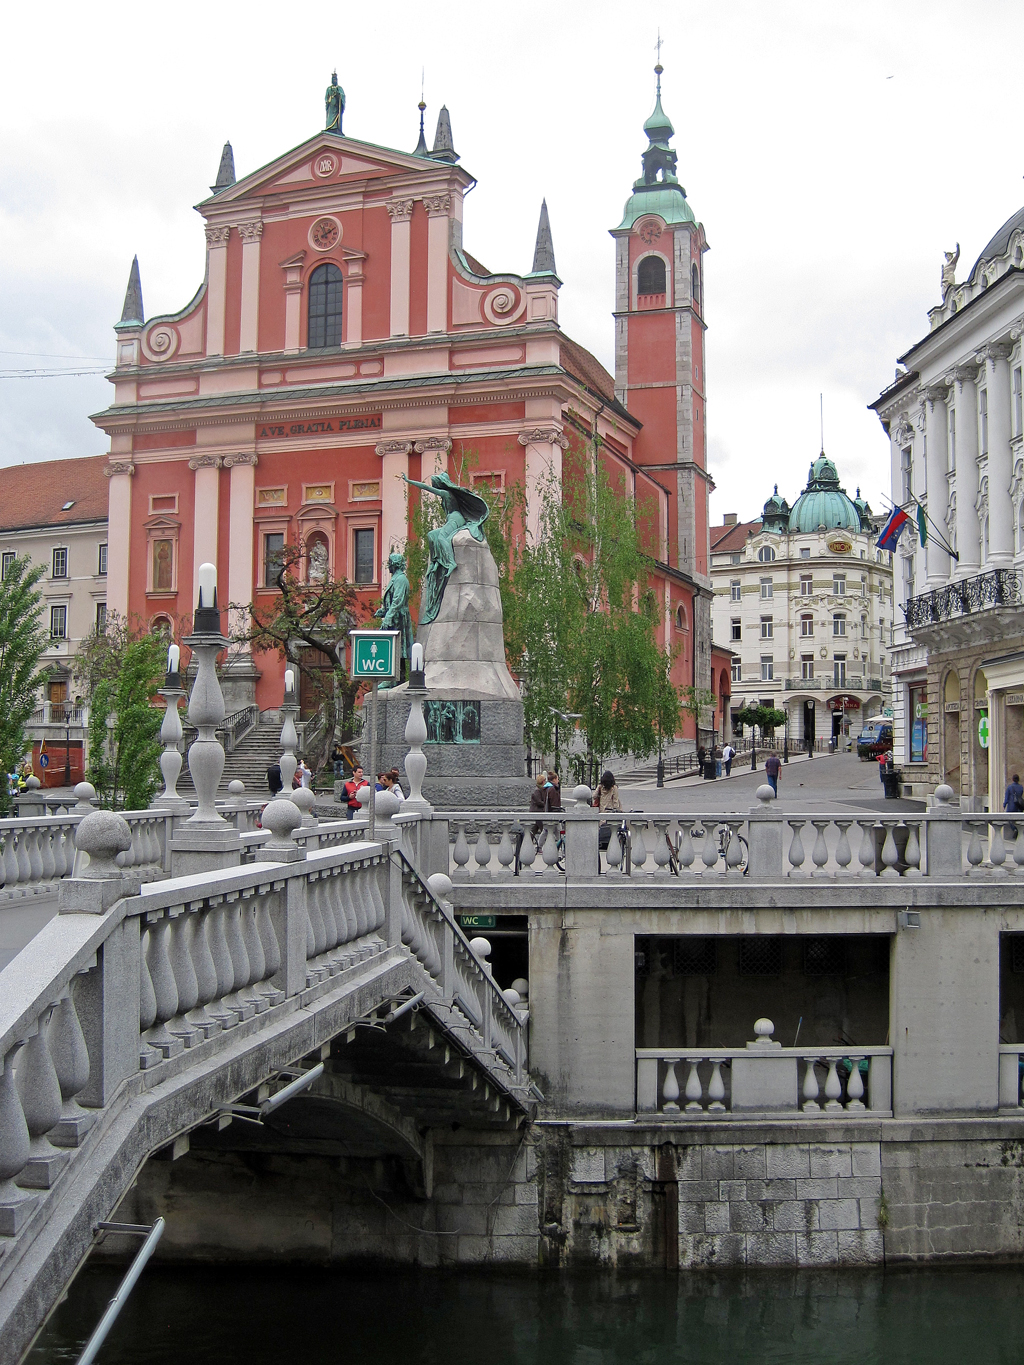
Ljubljana, Slovenia
Fun fact: They say that the tails of the dragons on Ljubljana’s famous Dragon Bridge wiggle when a virgin crosses it.
The town with the name that no English speaker has ever gotten right on the first try (L-yoo-blee-ahna), Ljubljana is like a miniature Vienna, not surprising since it was under Hapsburg rule for centuries. It’s minuscule compared to other European capitals, but that makes it easy to digest in a day or two. The town center has been beautifully pedestrianized by its former mayor, and the city’s best activity is to wander the side streets and roads lining the river. The sprawling modern part of town is uninspiring and there is little in the way of museums, so the pouring rain made it a little difficult to entertain ourselves after awhile. The best thing we did was the “free” tour of Ljubljana, led by an English-speaking guide with an encyclopedic and entertaining knowledge of her hometown. Though the tour is free, it’s good enough that you’ll want to donate a decent sum by the end of it. The morning of our departure, we took a breakneck shuttle ride to the laughably small airport and began our three leg journey home.

All in all, the Balkan countries seem to have mostly shaken off their ugly past and have as much to offer as any of their Western European counterparts. We both look forward to a return visit, mainly to explore more of Croatia’s stunning coastline. And that, folks, is where we’ve been and why you haven’t heard much about house projects lately.